09-14-08 Mini Ridge
I worked on the ridge that will sit in front of the track forming the opposite side of the rock cut.
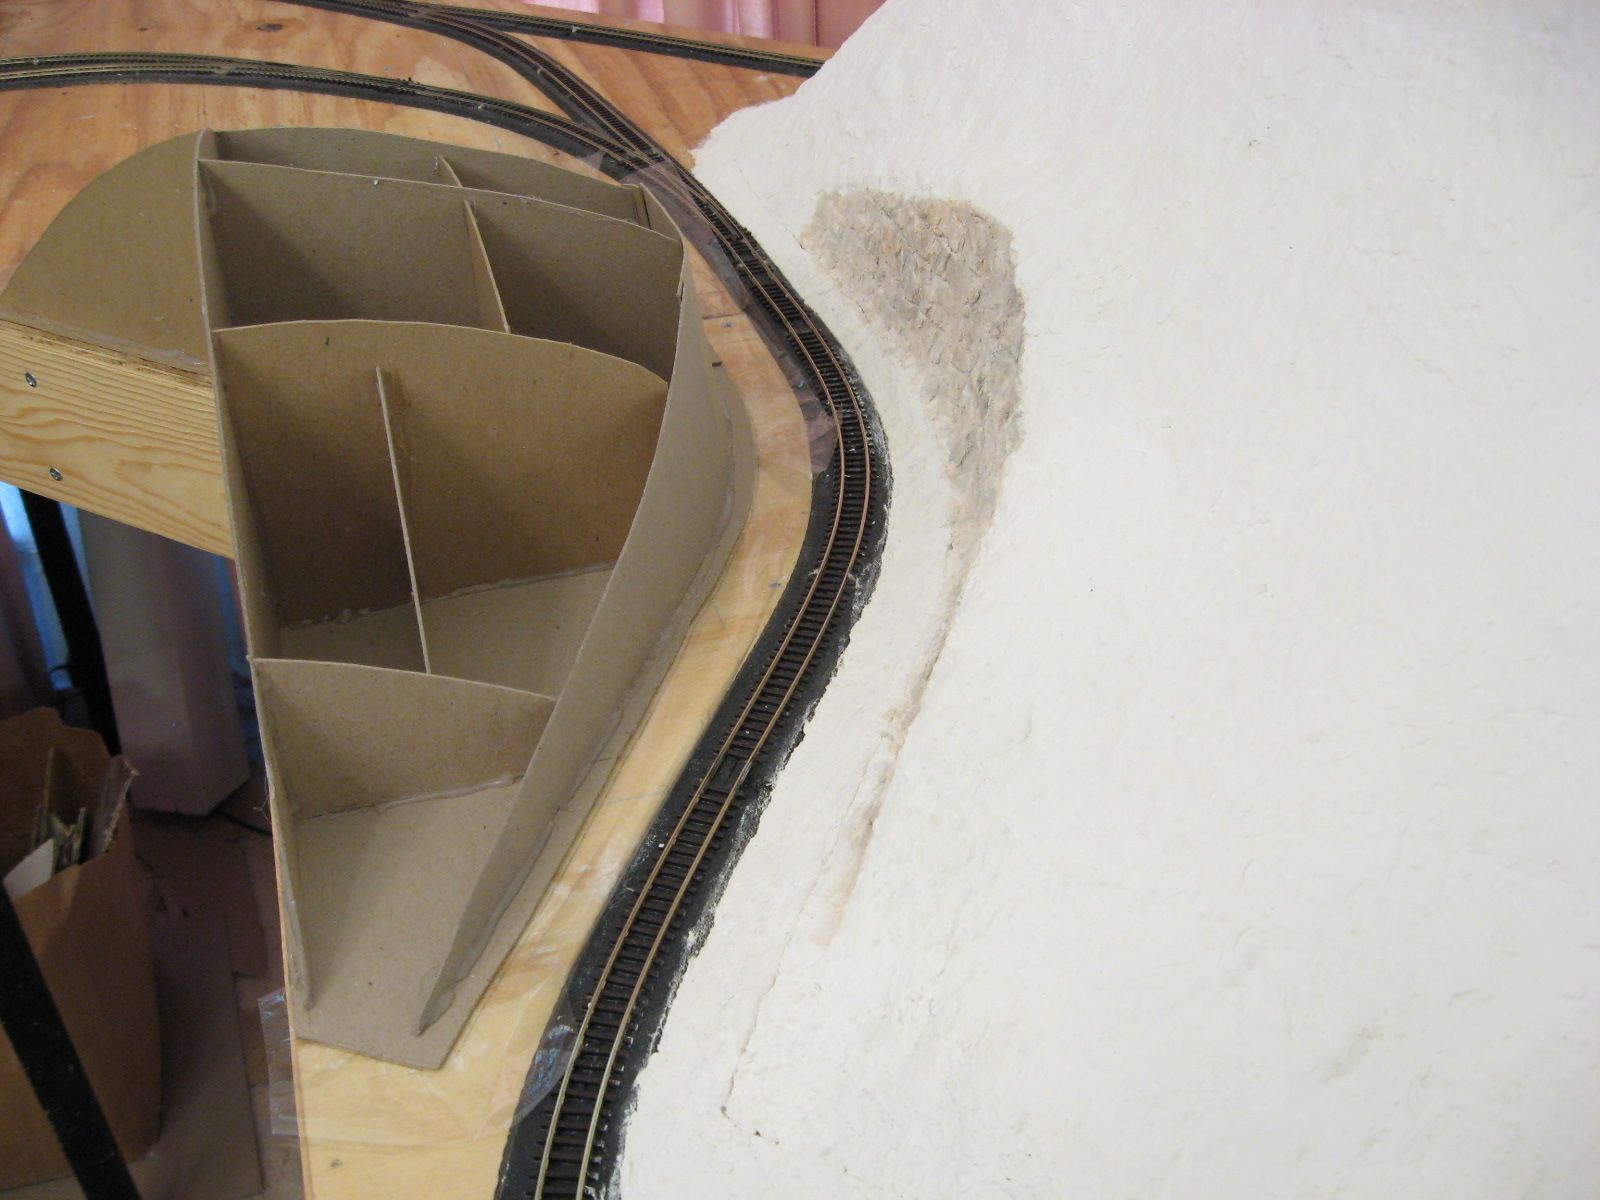
I had created the basic shape of the ridge back when I constructed the larger ridge. I laid down a layer of plastic warp to help protect the track and to provide a separator when I build the seam. This ridge has to be removable because it sits spans two modules.
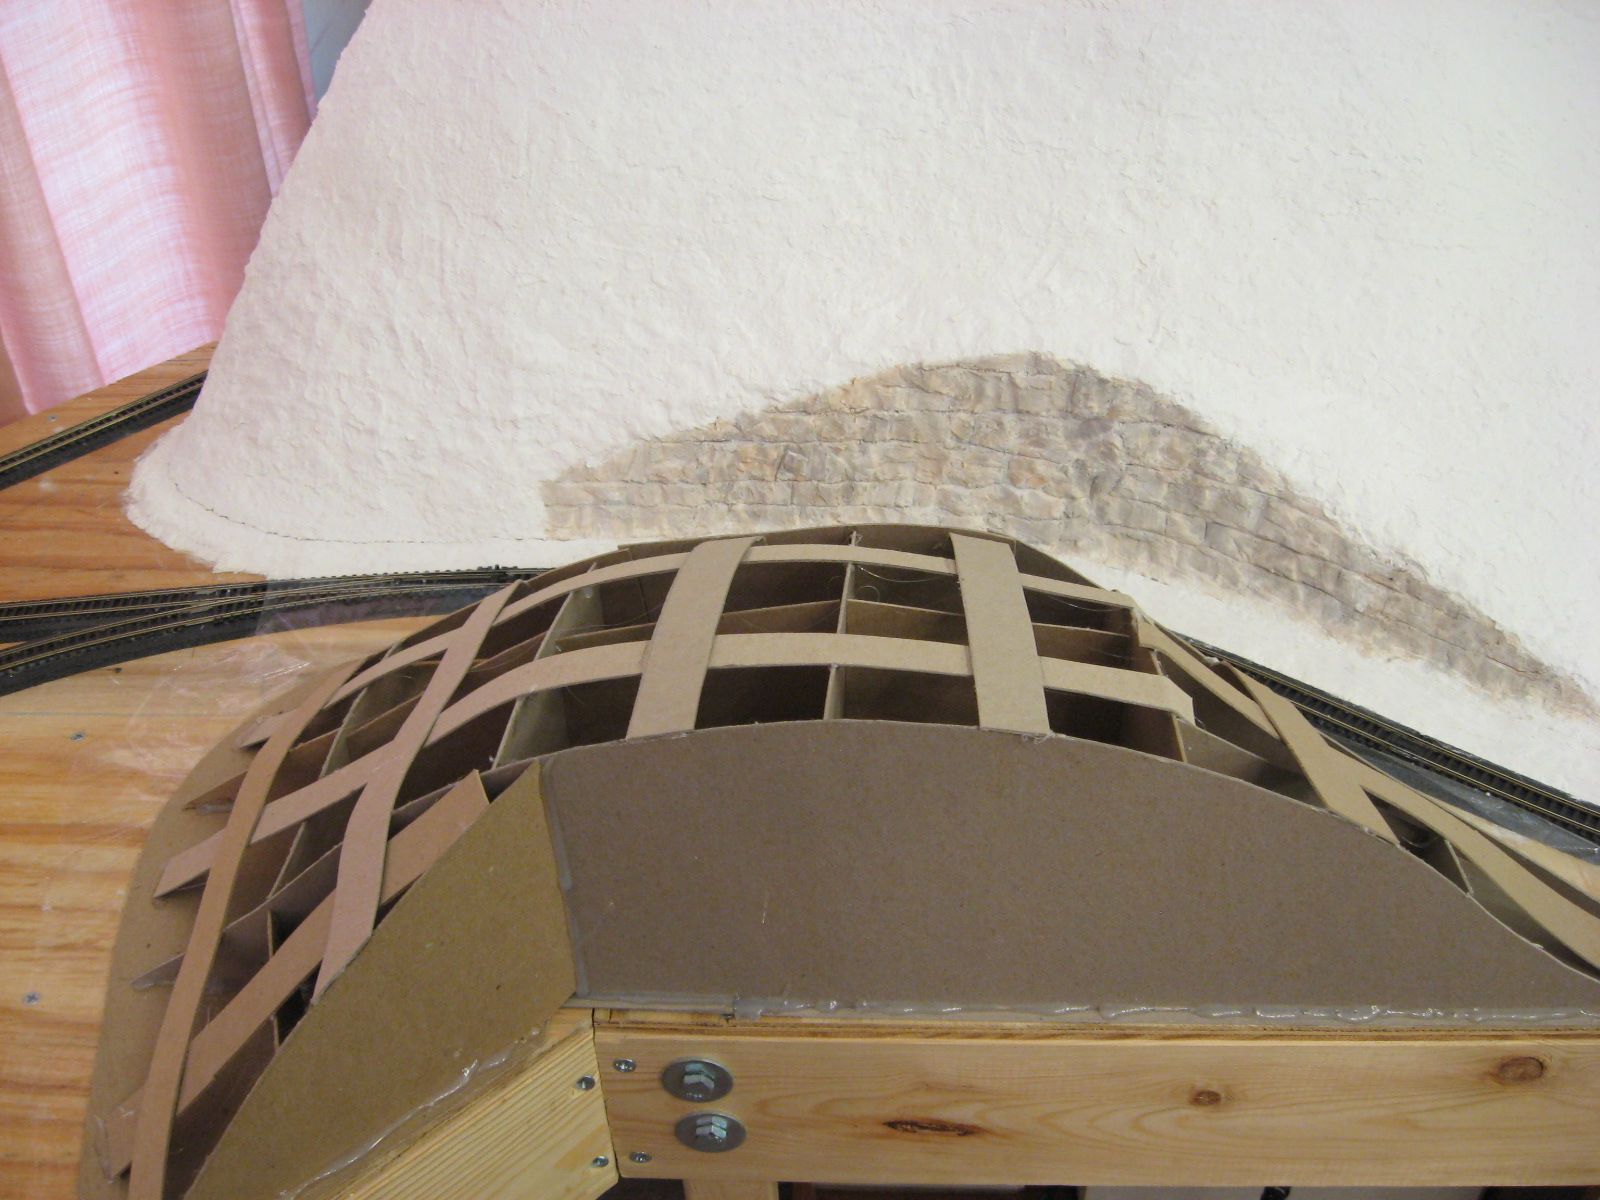
Just like the larger mountain ridge, I applied a cardboard latticework to provide a surface for the plaster cloth to adhere to.
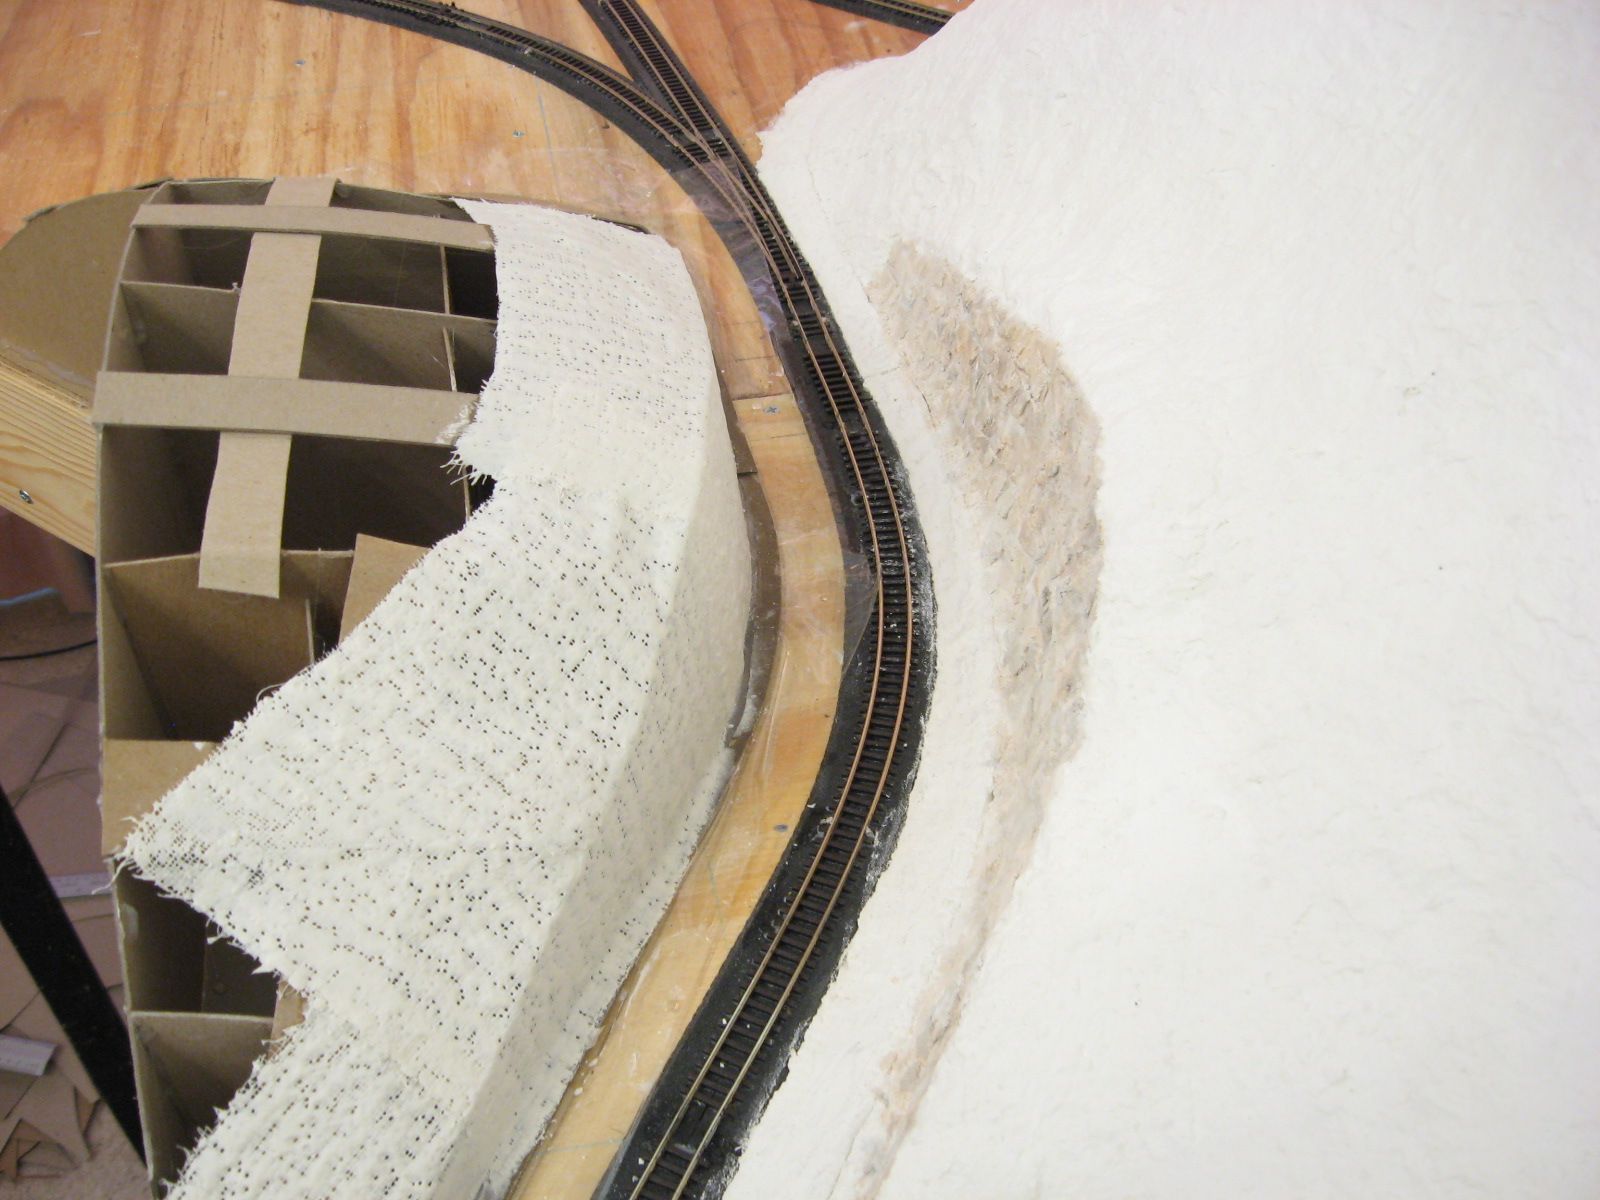
I applied plaster cloth starting from the bottom of the ridge working up. I overlapped the edges of the cloth. I let it dry a few days before proceeding.

I glued a couple layers of scrap cardboard to the two front facing surfaces of the ridge to bring it level with the module frame. I then glued two cardboard fascia pieces to these. I did not glue the fascia pieces to the module frame since this is removable.
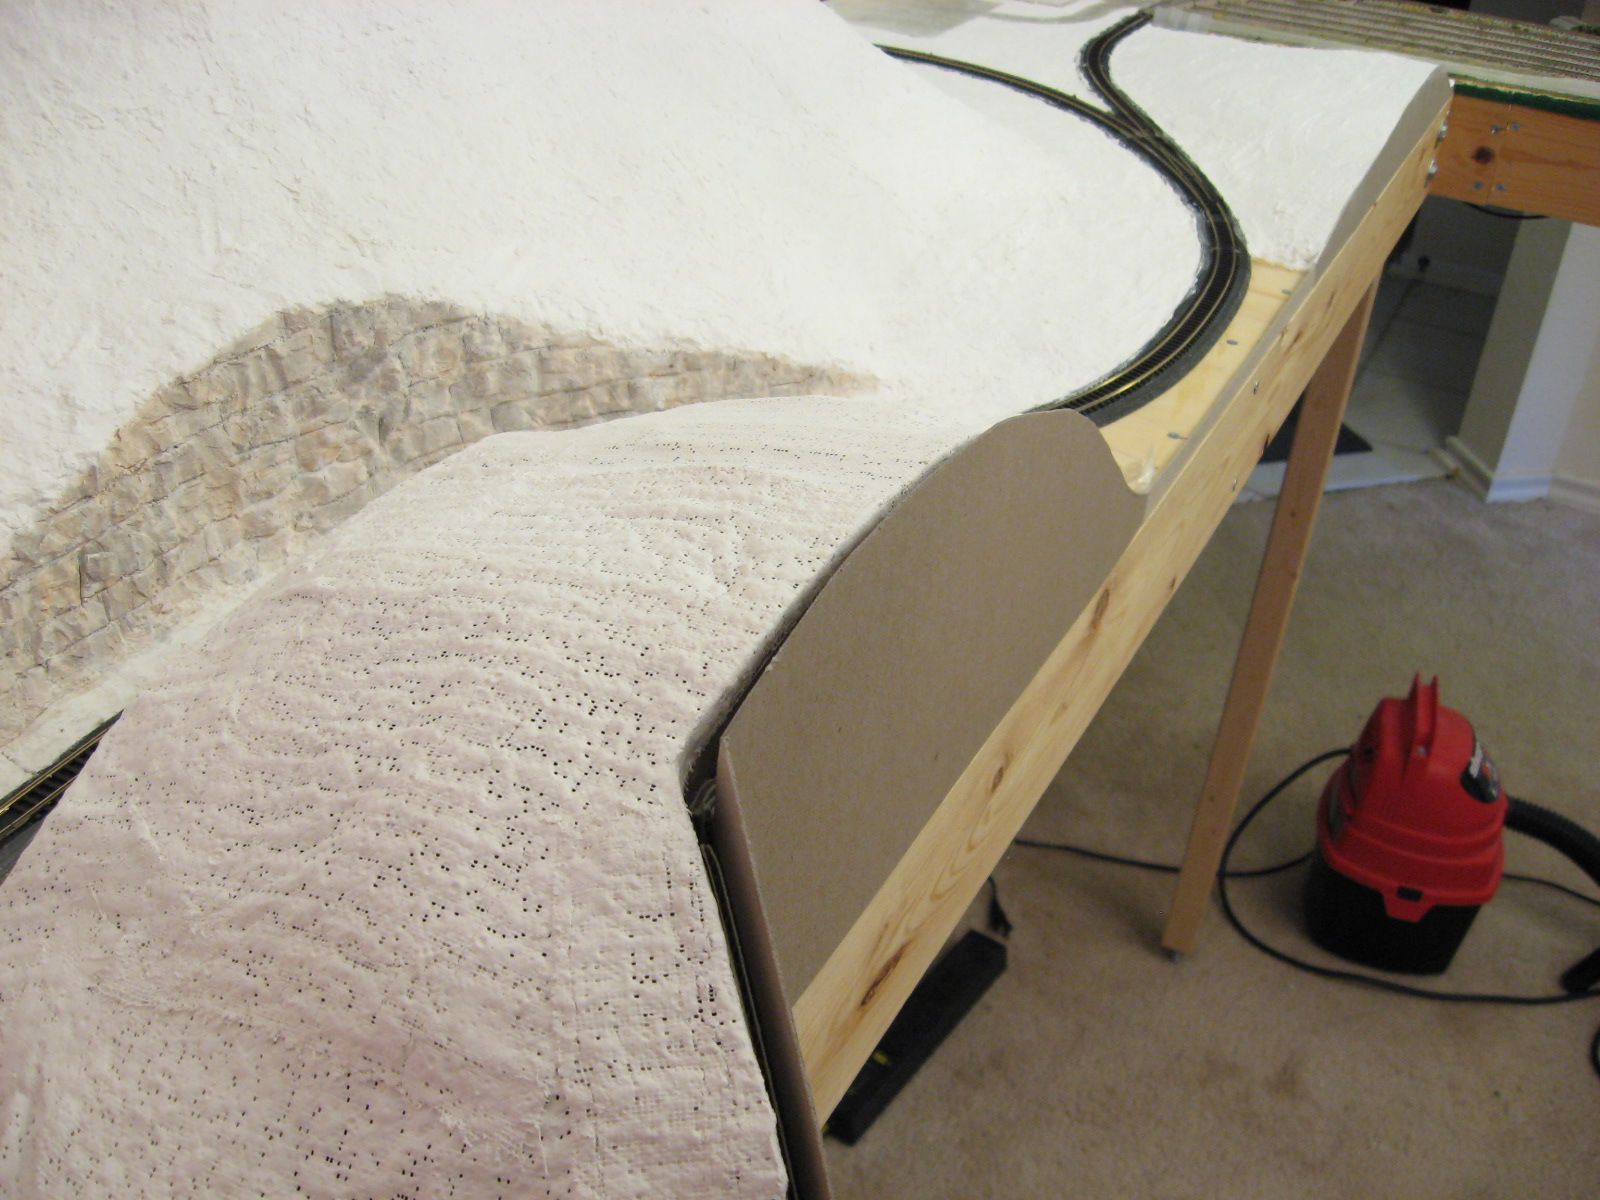
I trimmed the fascia pieces to match the contour of the ridge allowing for the thickness of the Sculptamold layer. I add another fascia piece to fill in the gap between this ridge and the smaller hill I added in the last entry.
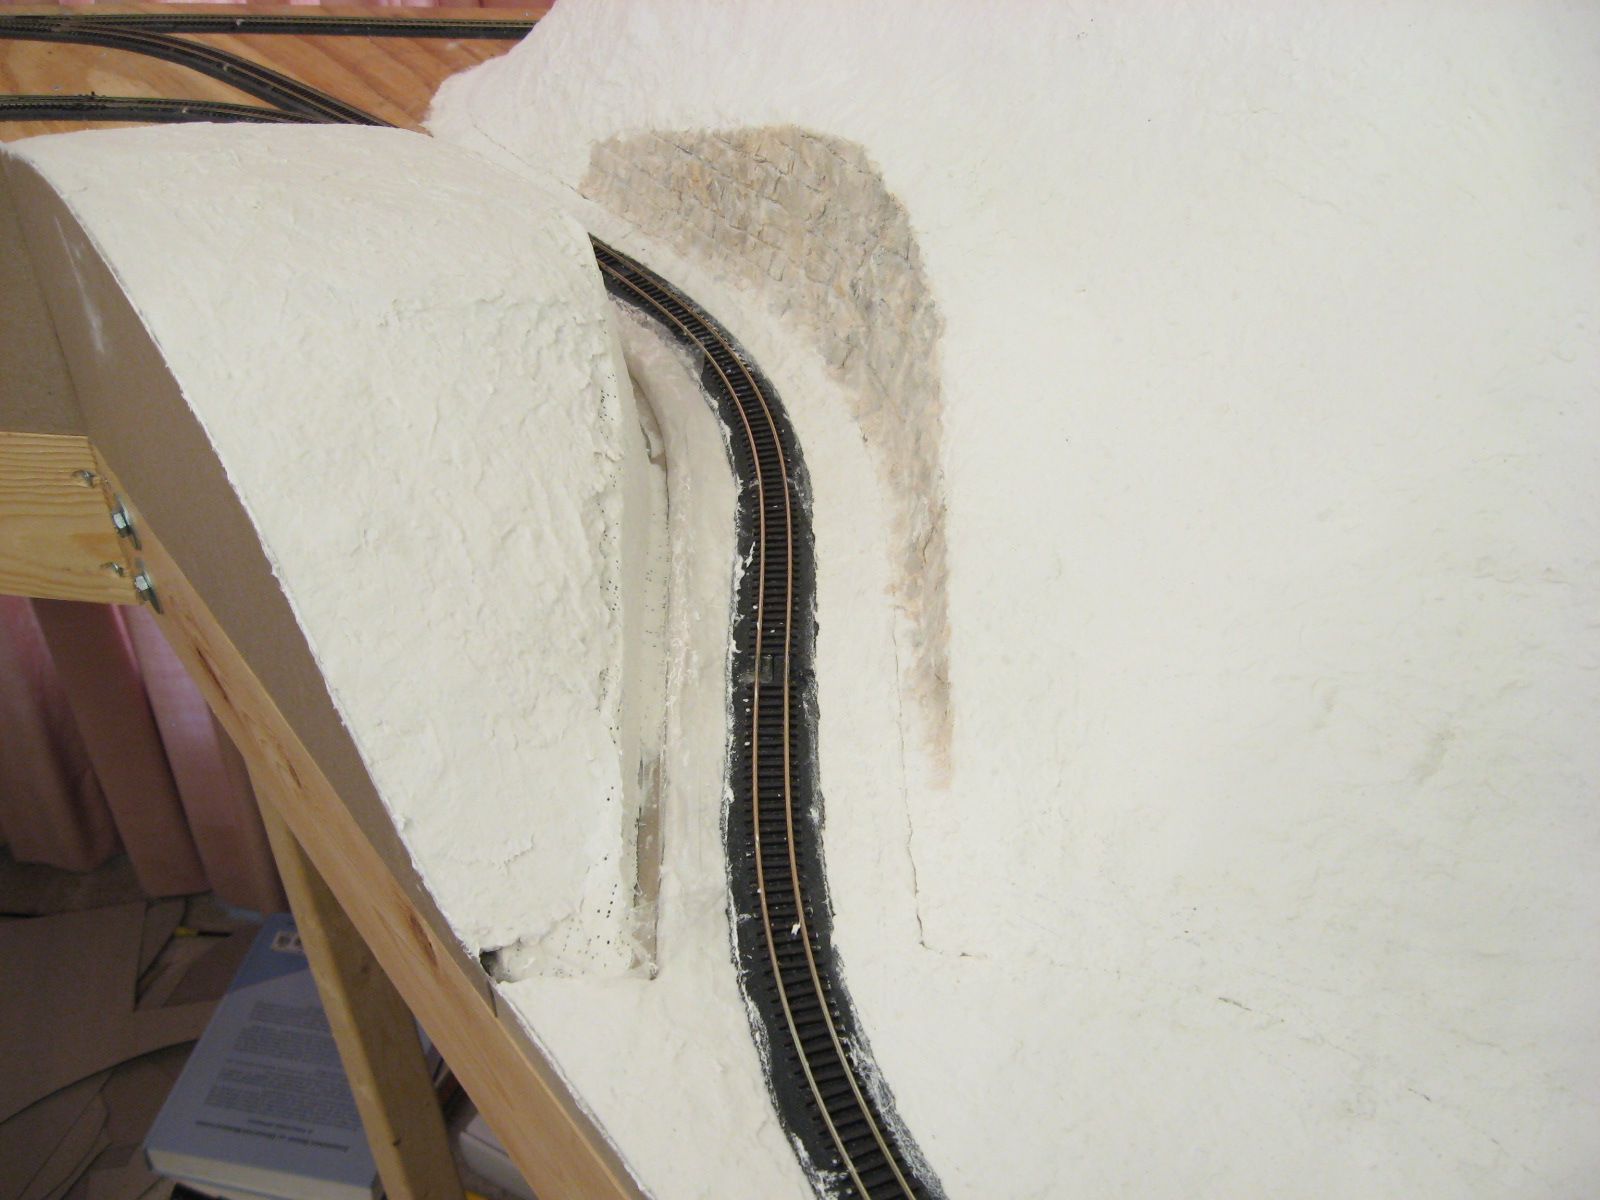
I applied Sculptamold on the plywood surface surrounding the ridge and the ridge�s surface. I lifted the plastic wrap out of the way when I placed the Sculptamold between the ridge and the track. After that dried for a few days, I laid the plastic wrap back down over Sculptamold and track. I applied Sculptamold in the gap between the ridge and the protected layer of Sculptamold. I let it dry a few days before I filed the surfaces to create the seam.
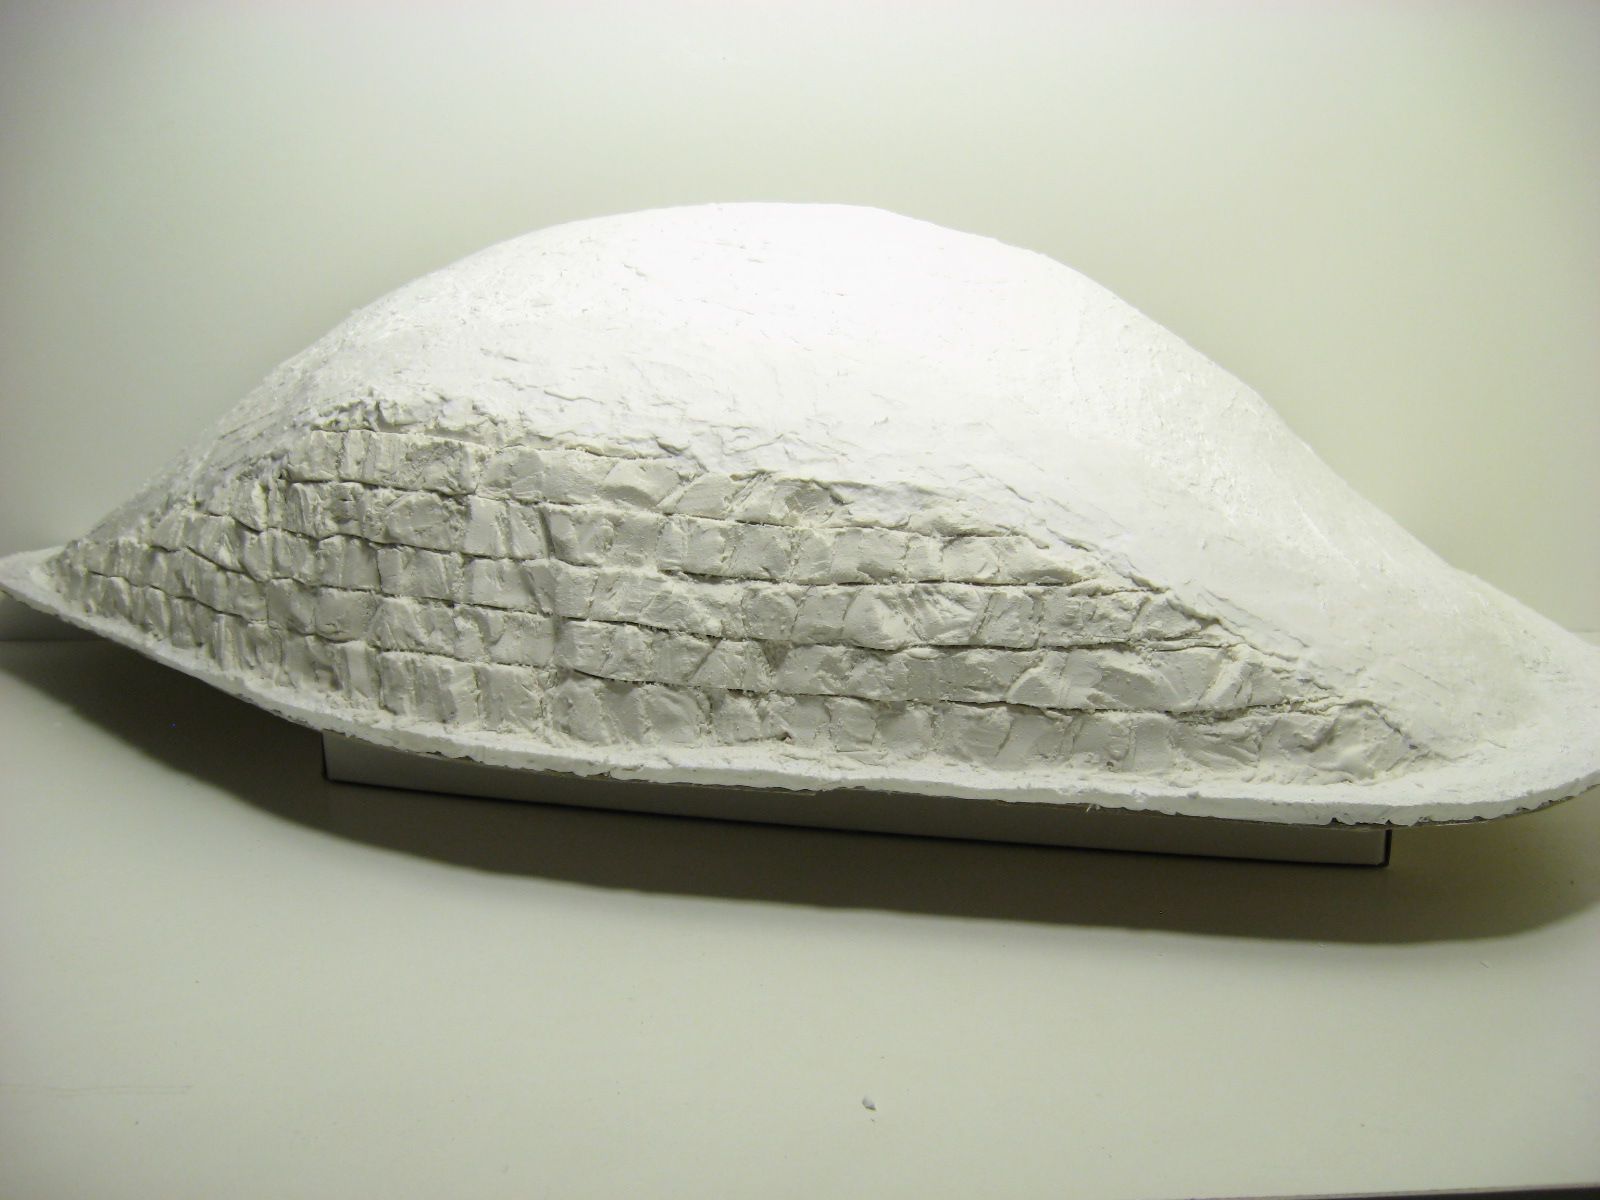
I removed the ridge from the layout to work on the rock face. Using Hydrocal, I created the rock surface in the same manor as the rock face on the opposite of the cut. I covered any ramming surfaces with Sculptamold.
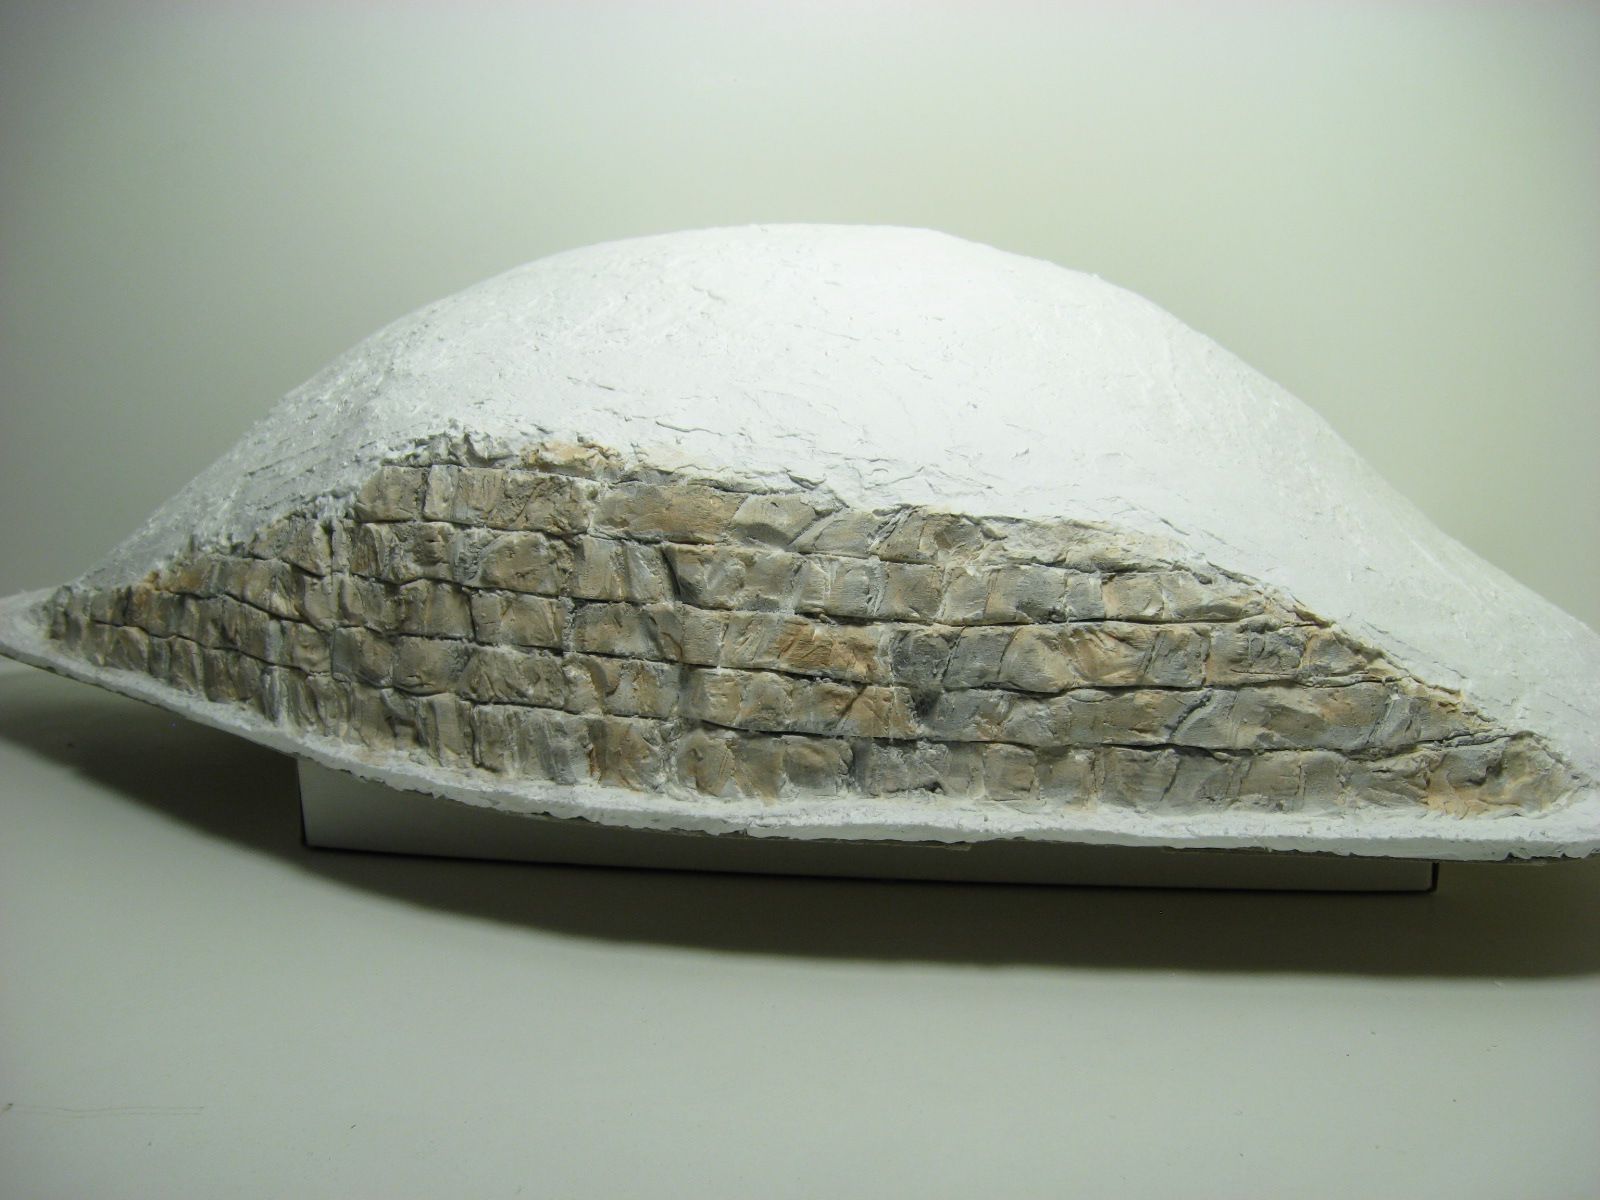
I also painted the rocks the same way. I applied a black wash, and then a brown wash. Next, I will need to add some color to the rest of this ridge and the large ridge.