04-11-08 Change of Scenery
The first change of scenery is the website itself. I installed a new content management system to fix a few things that I did not like about the previous one I was using. The original content is still here. I have added a feature to the Expansion section that will group the articles by the type of work.
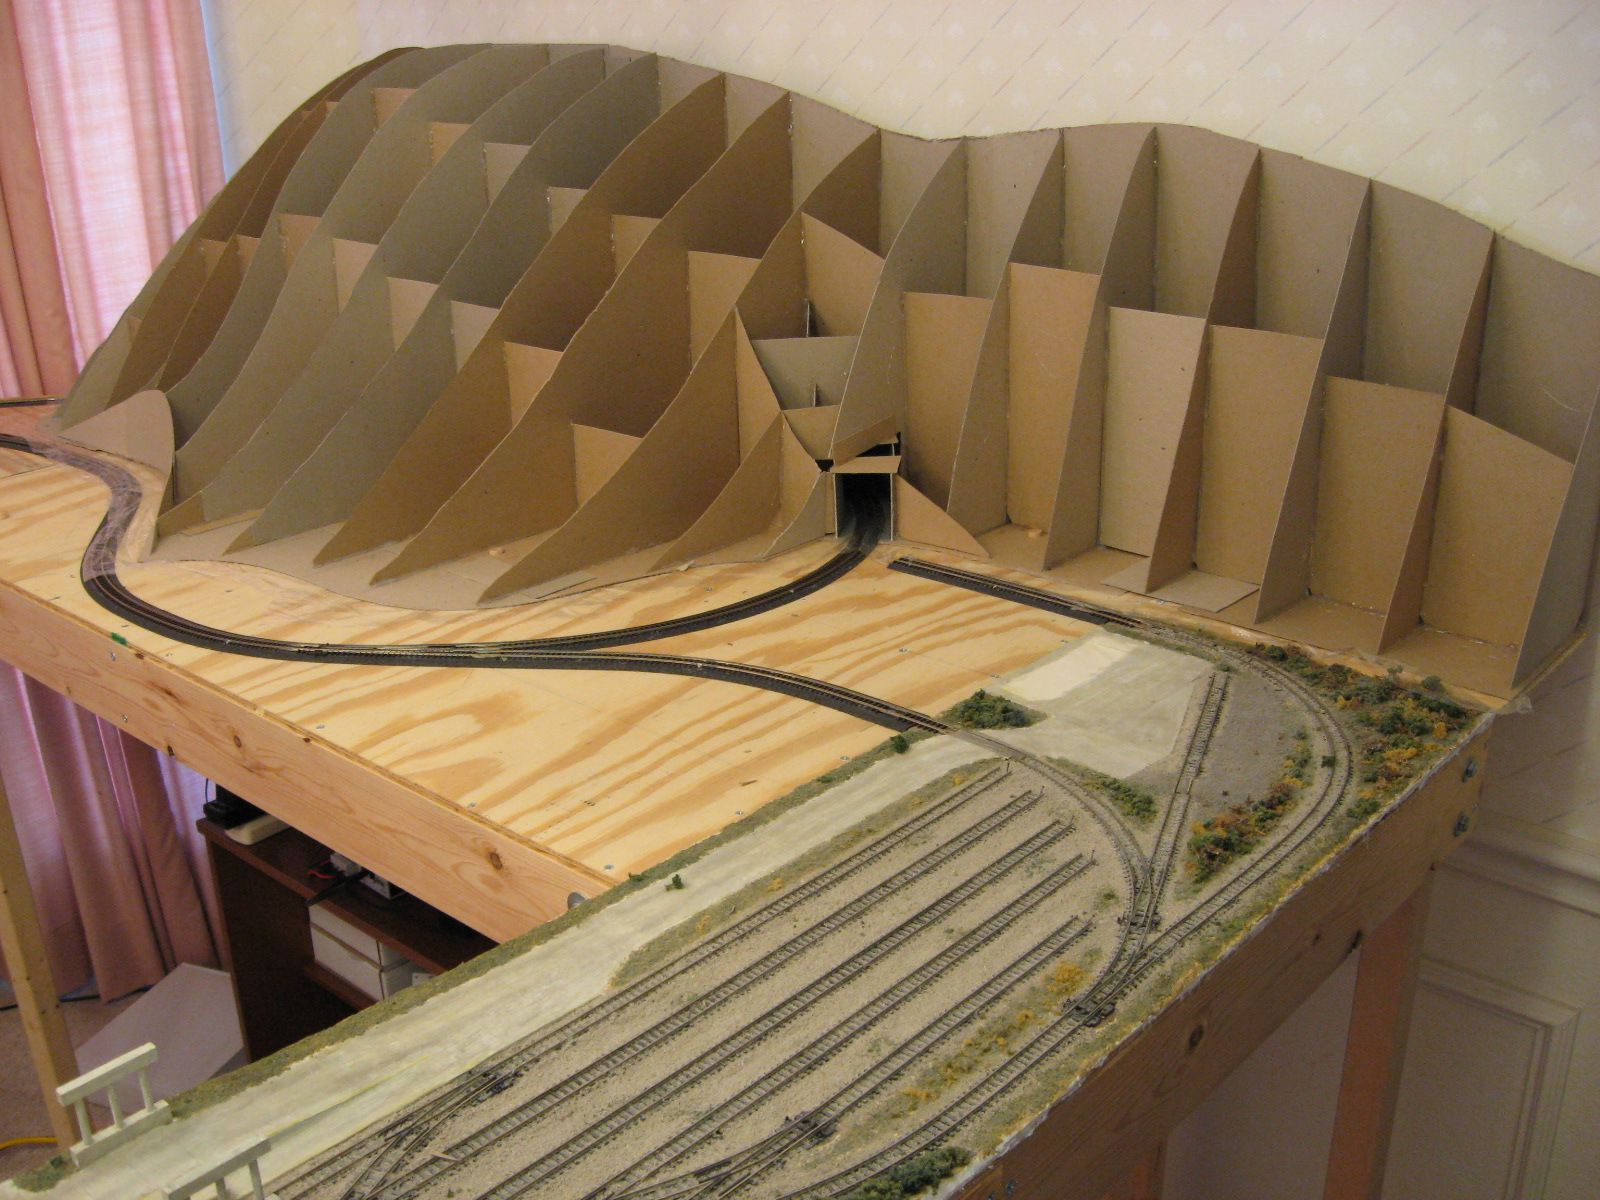
The second change of scenery is on the layout. I decided to take a break from model building and work on some scenery. I started work on the mountain ridge that will span the two modules between the NTRAK module and the yard module.
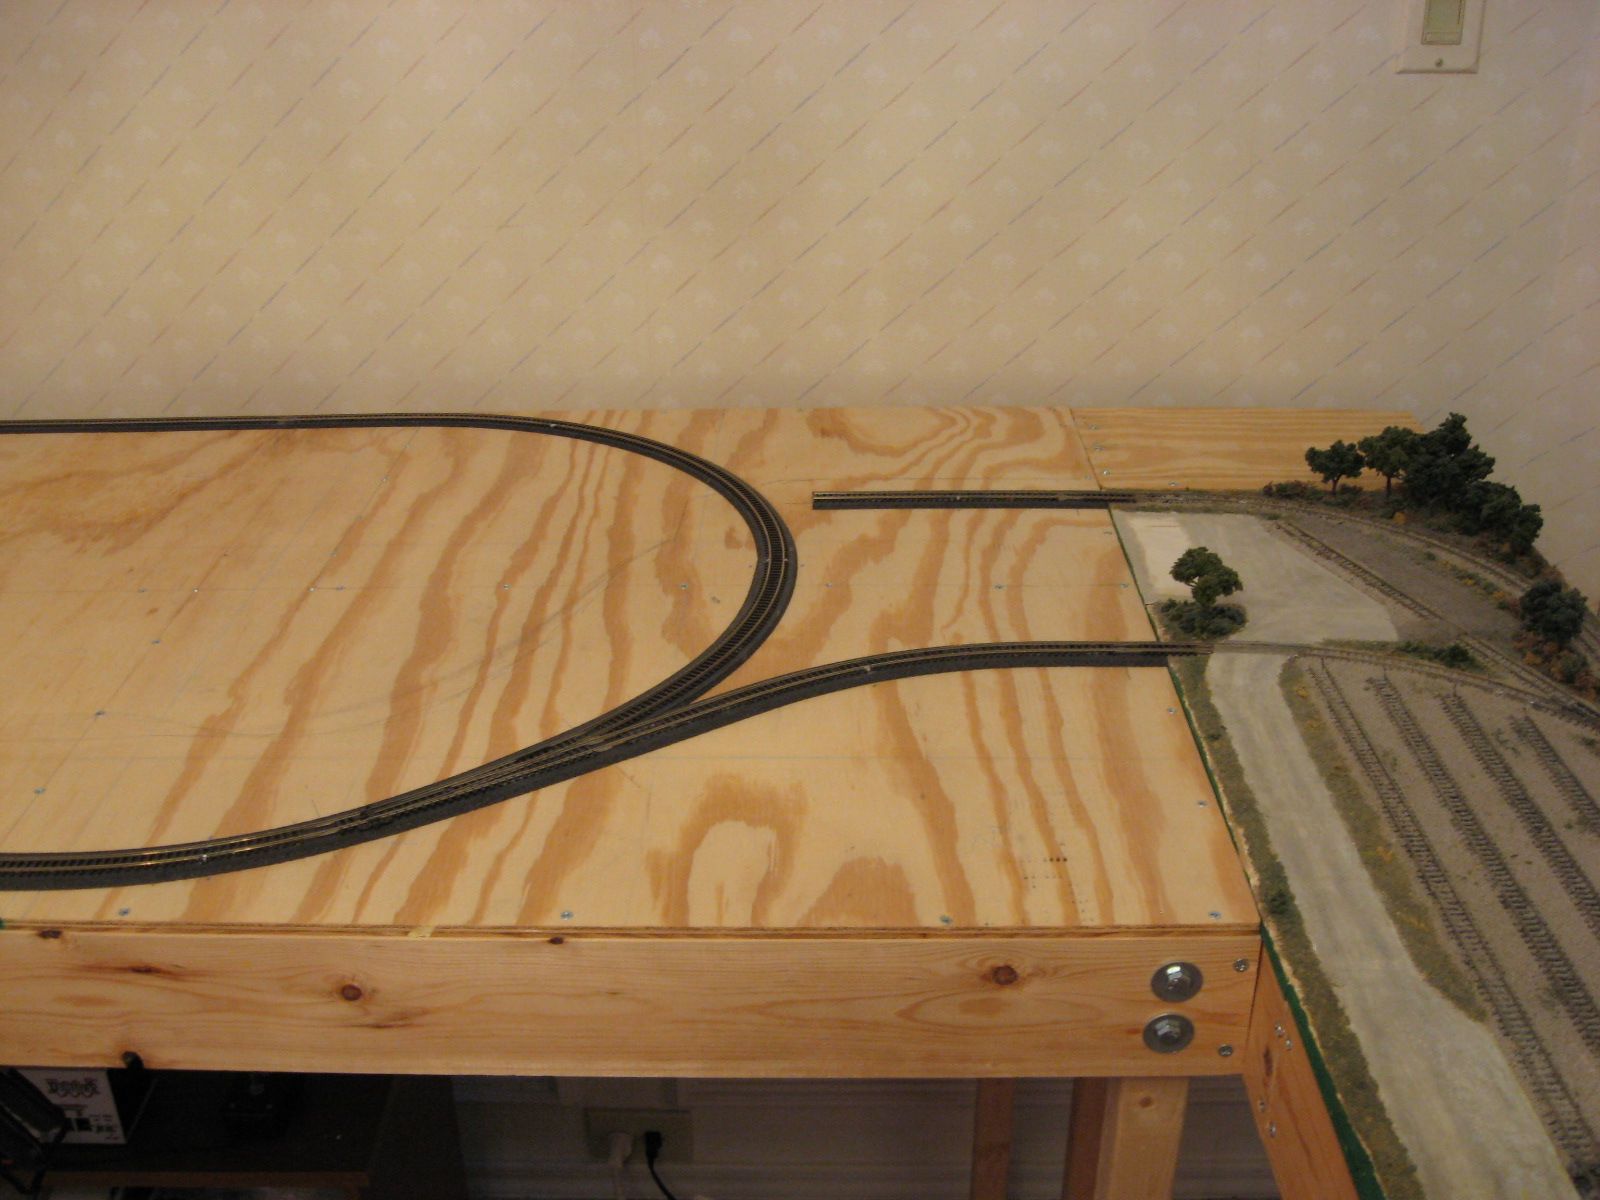
I built a shelf out of scrap wood to fill in the gap between the yard module and the wall. It is bolted to the two adjoining modules. The ridge will sit on this shelf and two other modules.
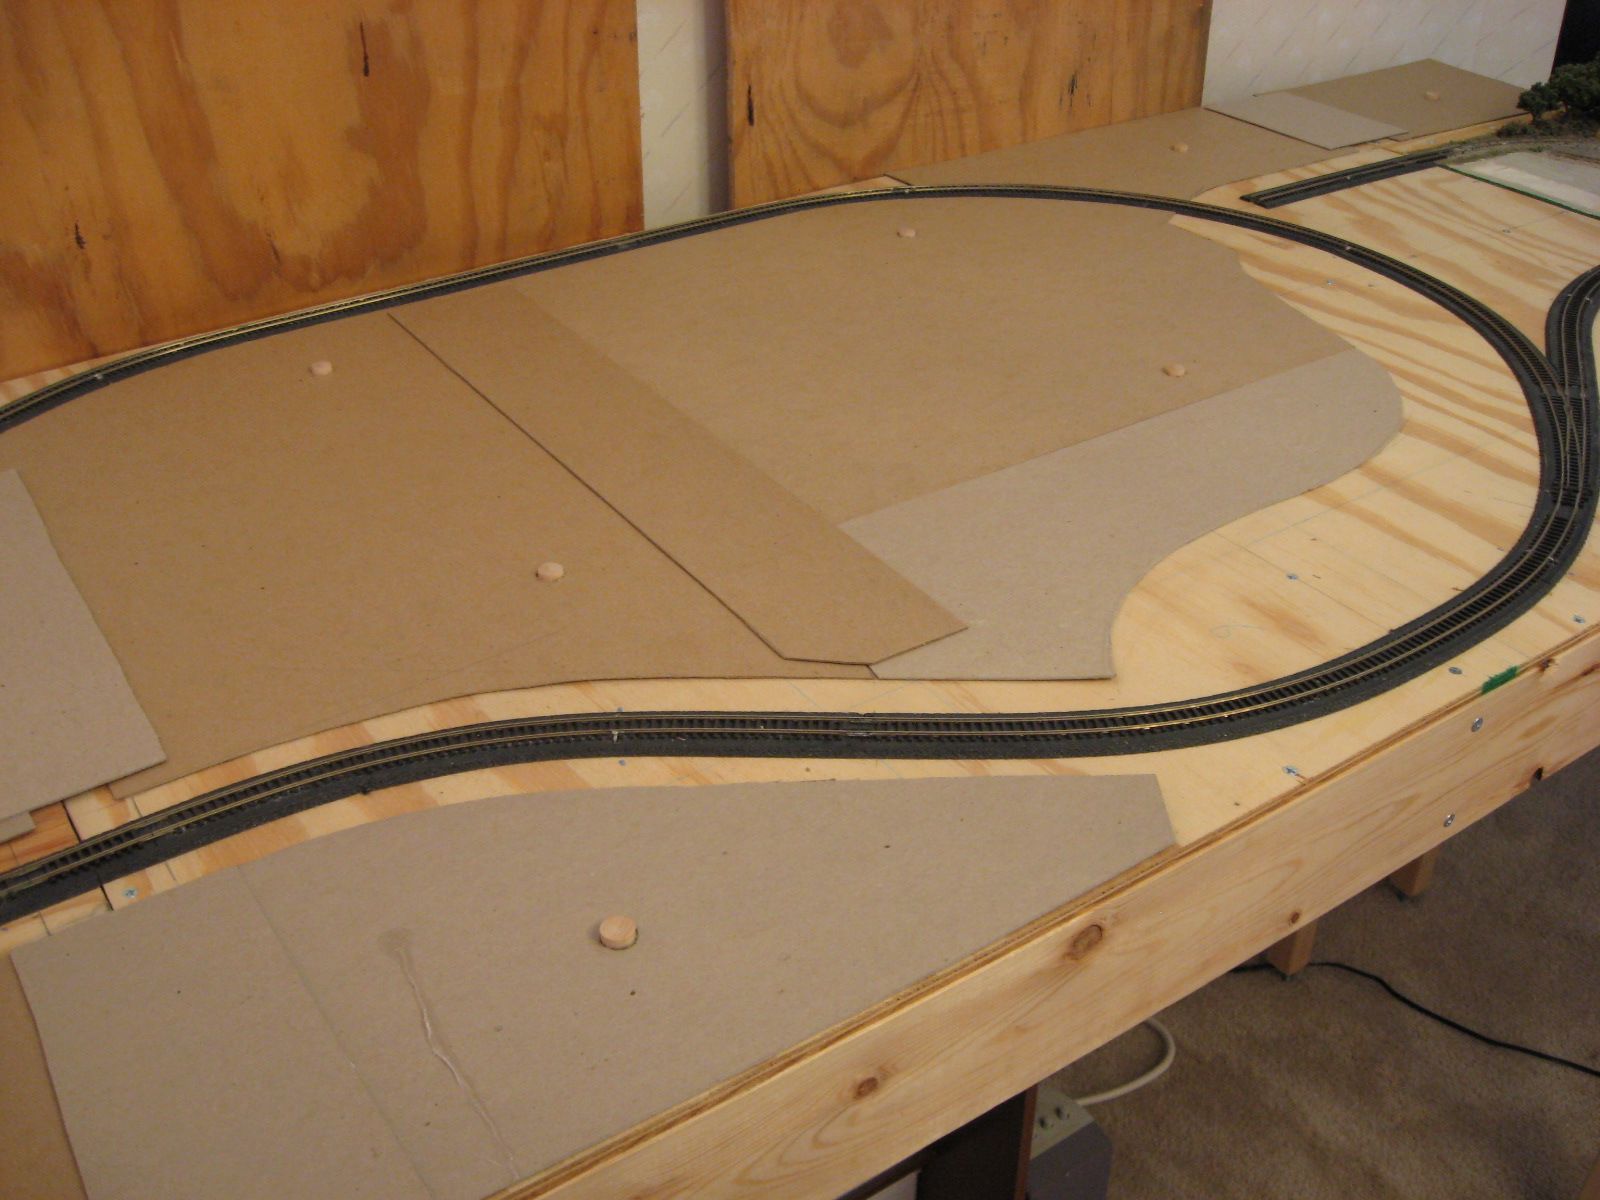
I am designing this ridge to be removable so I can access the track underneath. I cut cardboard pieces to fit the contour of the track and base of the mountain ridge. I attached cardboard to adjoining sheets to form continuous spans. I cut circular holes in the cardboard the same diameter as some wood pegs I purchased at a craft store. I glued the wood pegs to the plywood through the holes in the cardboard. This will keep the ridge in the same position.
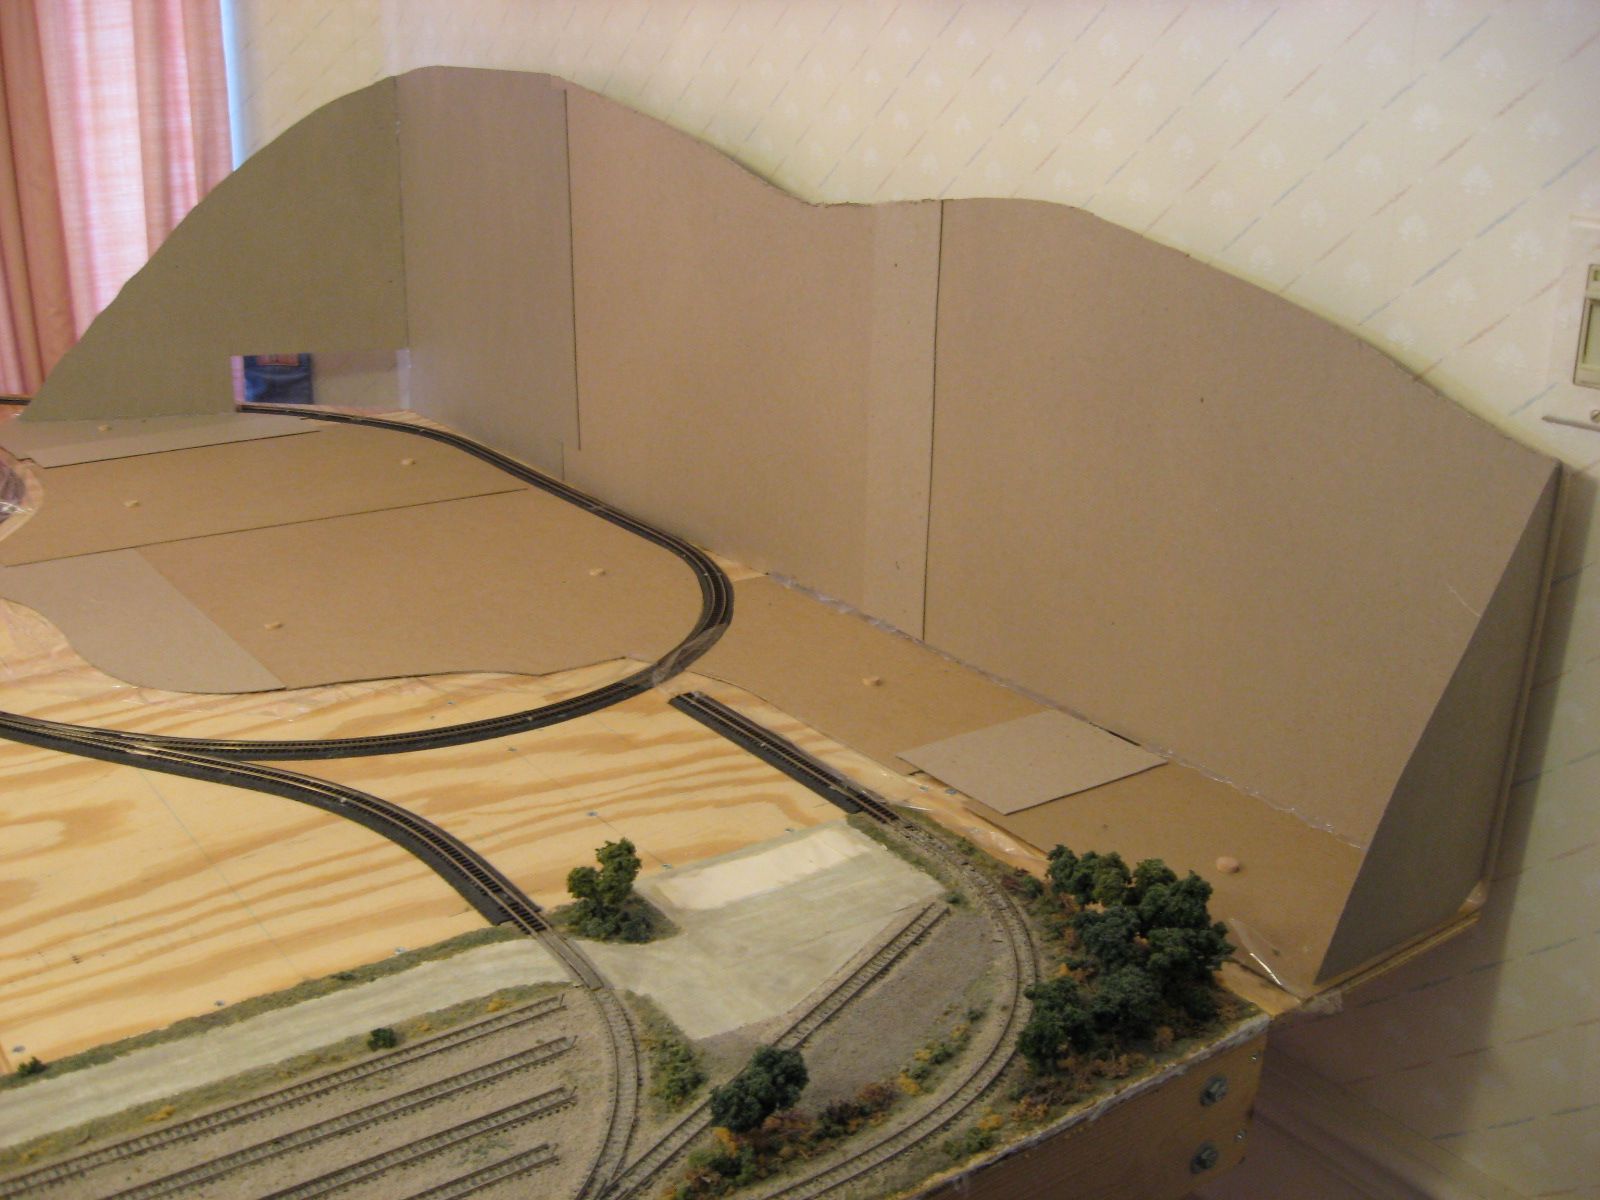
I temporarily installed two pieces of plywood on the back of the modules to help support the back of the ridge. I hot glued vertical cardboard pieces to the cardboard base. I added the two sides to help support the back. I trimmed the top of the cardboard to form the ridge top contour.

I hot glued a couple vertical walls to the base to form the tunnel. I panted the tunnel walls and floor gray. I added some pieces on top for support.
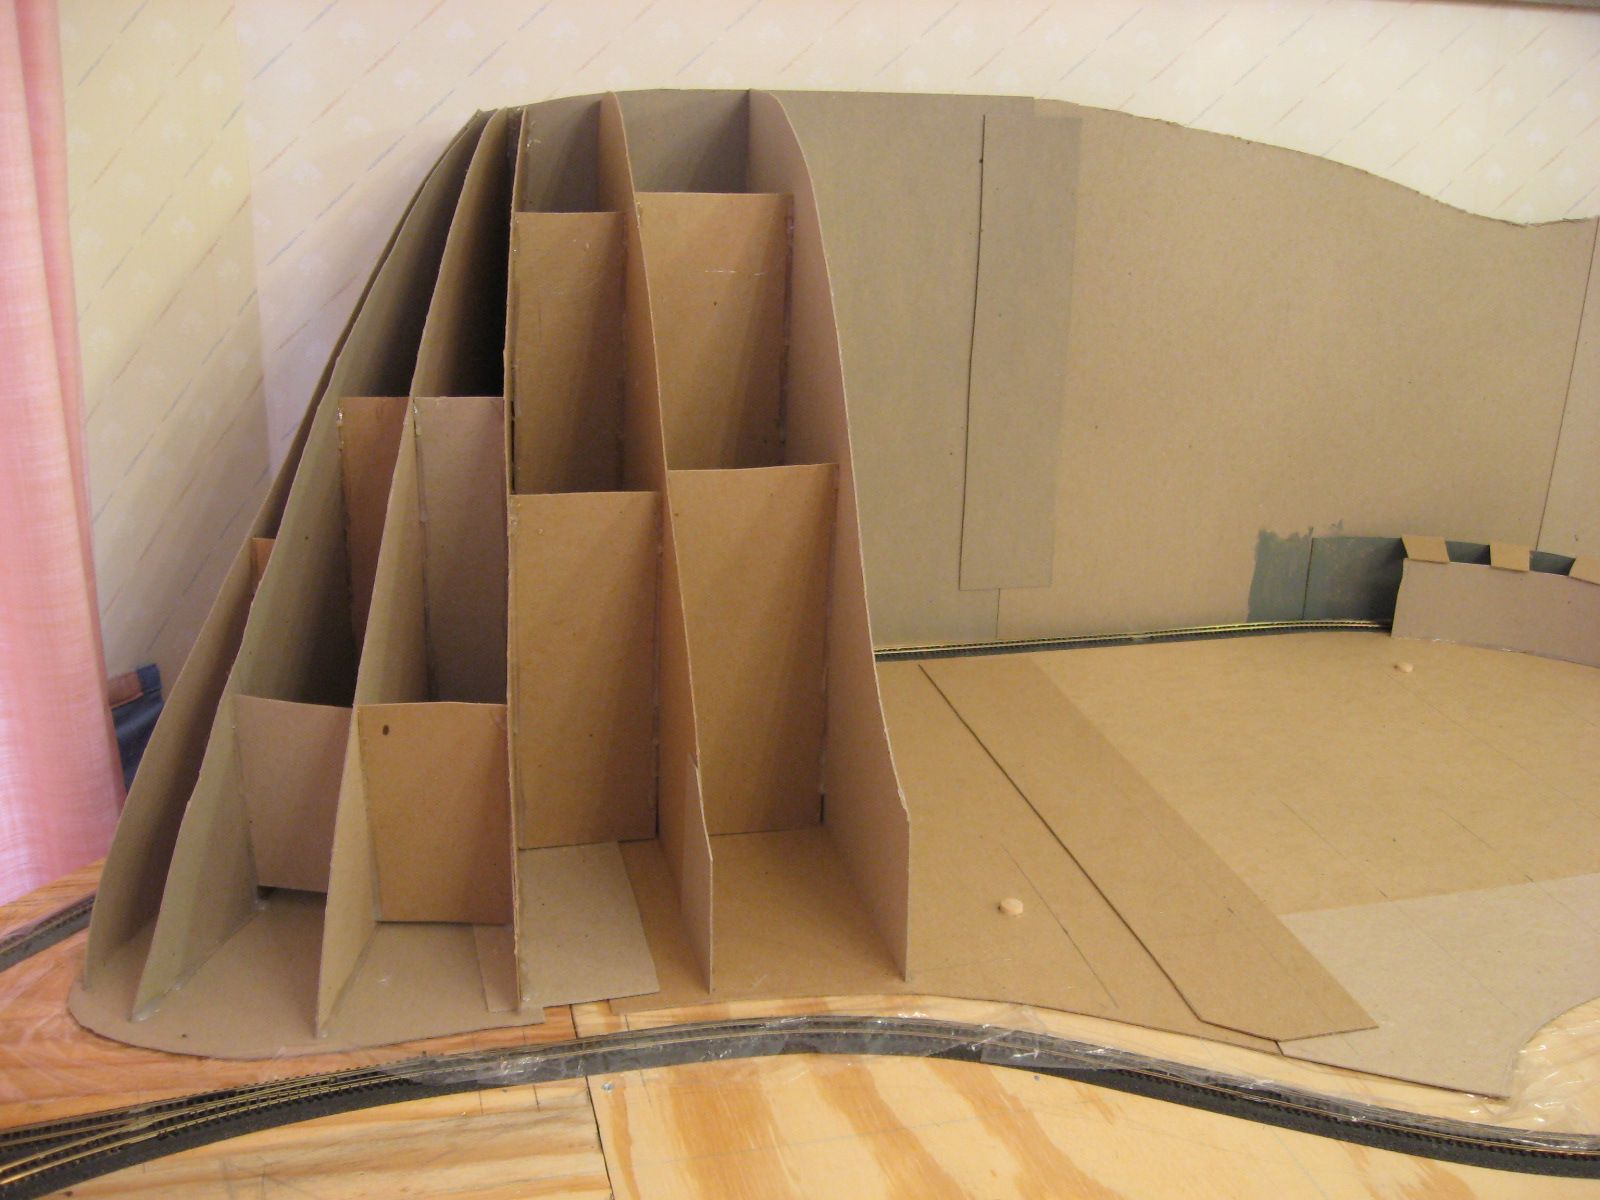
Next, I started to construct the ridge framing. I cut a piece of cardboard to form the contour of the ridge in the area I was working. I hot glued that to the back wall and base. I left enough space between the walls to allow my hand and the glued gun to fit between them. I cut rectangular pieces to glue between the new wall and the previous one. I repeated this all the way across the ridge. I had to be careful to not get any glue on the alignment pegs.
I had to reinforce the tunnel area since the base was not continuous through there. It had to be strong enough so it could be lifted.
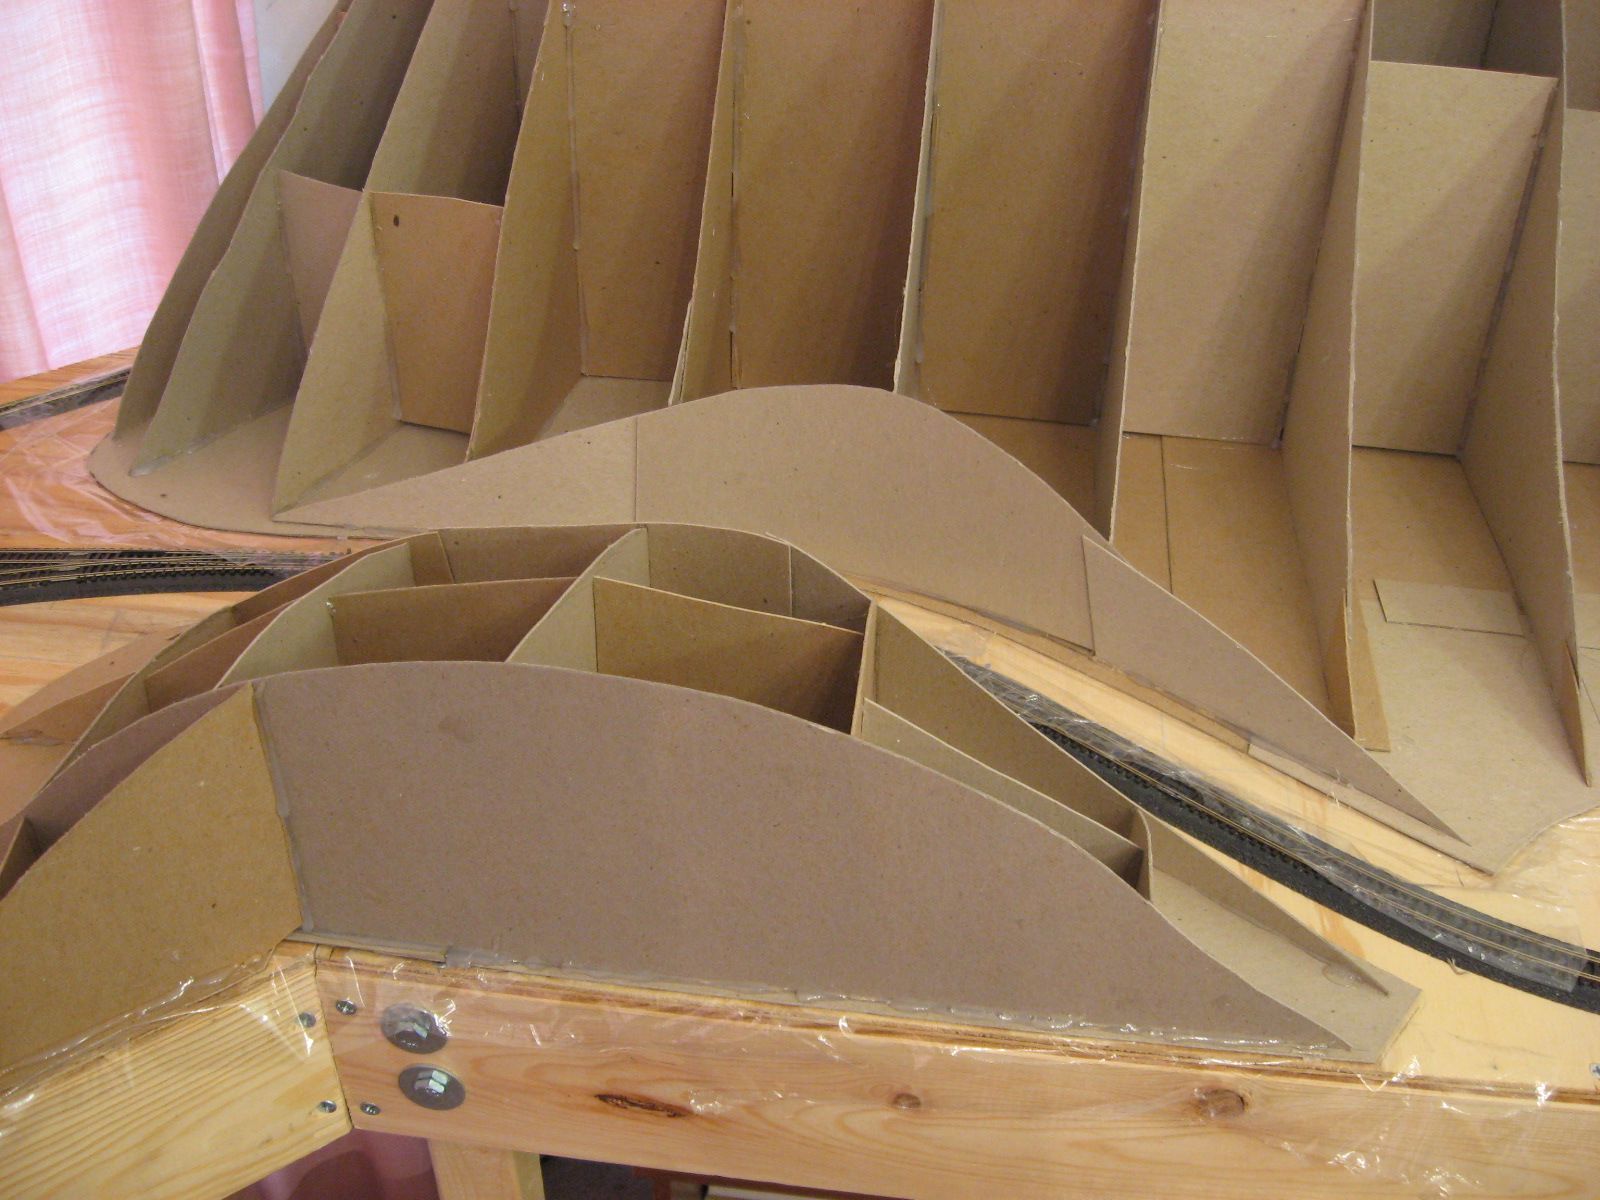
I constructed the hill shown in front in the same manor. It is also removable only because it spans two modules. This hill and the ridge form a cut that the track runs through.
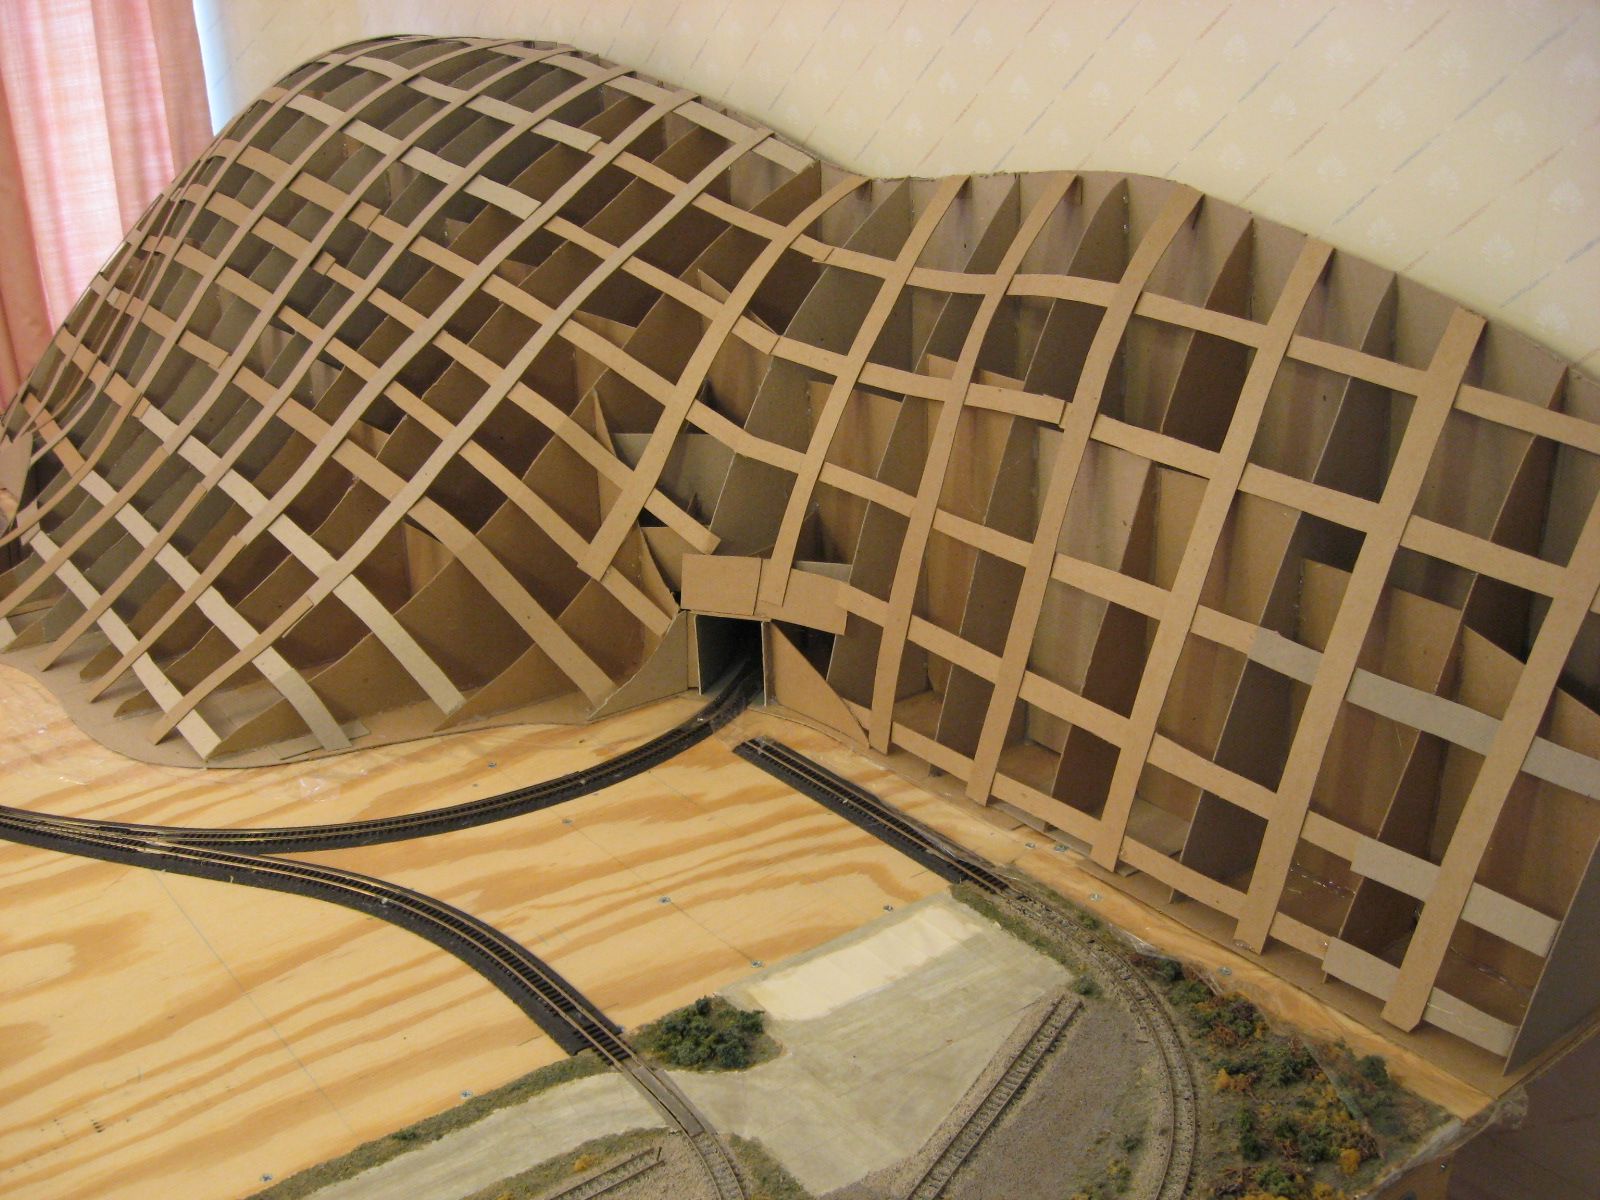
I glued horizontal strips to the wall edges to form the horizontal ridge contours. I then glued vertical strips on top. This will form the base to lay plaster cloth on top.