06-14-08 Tunnel Portal
Before I could continue the scenery on the mountain ridge, I had to install the tunnel portal.
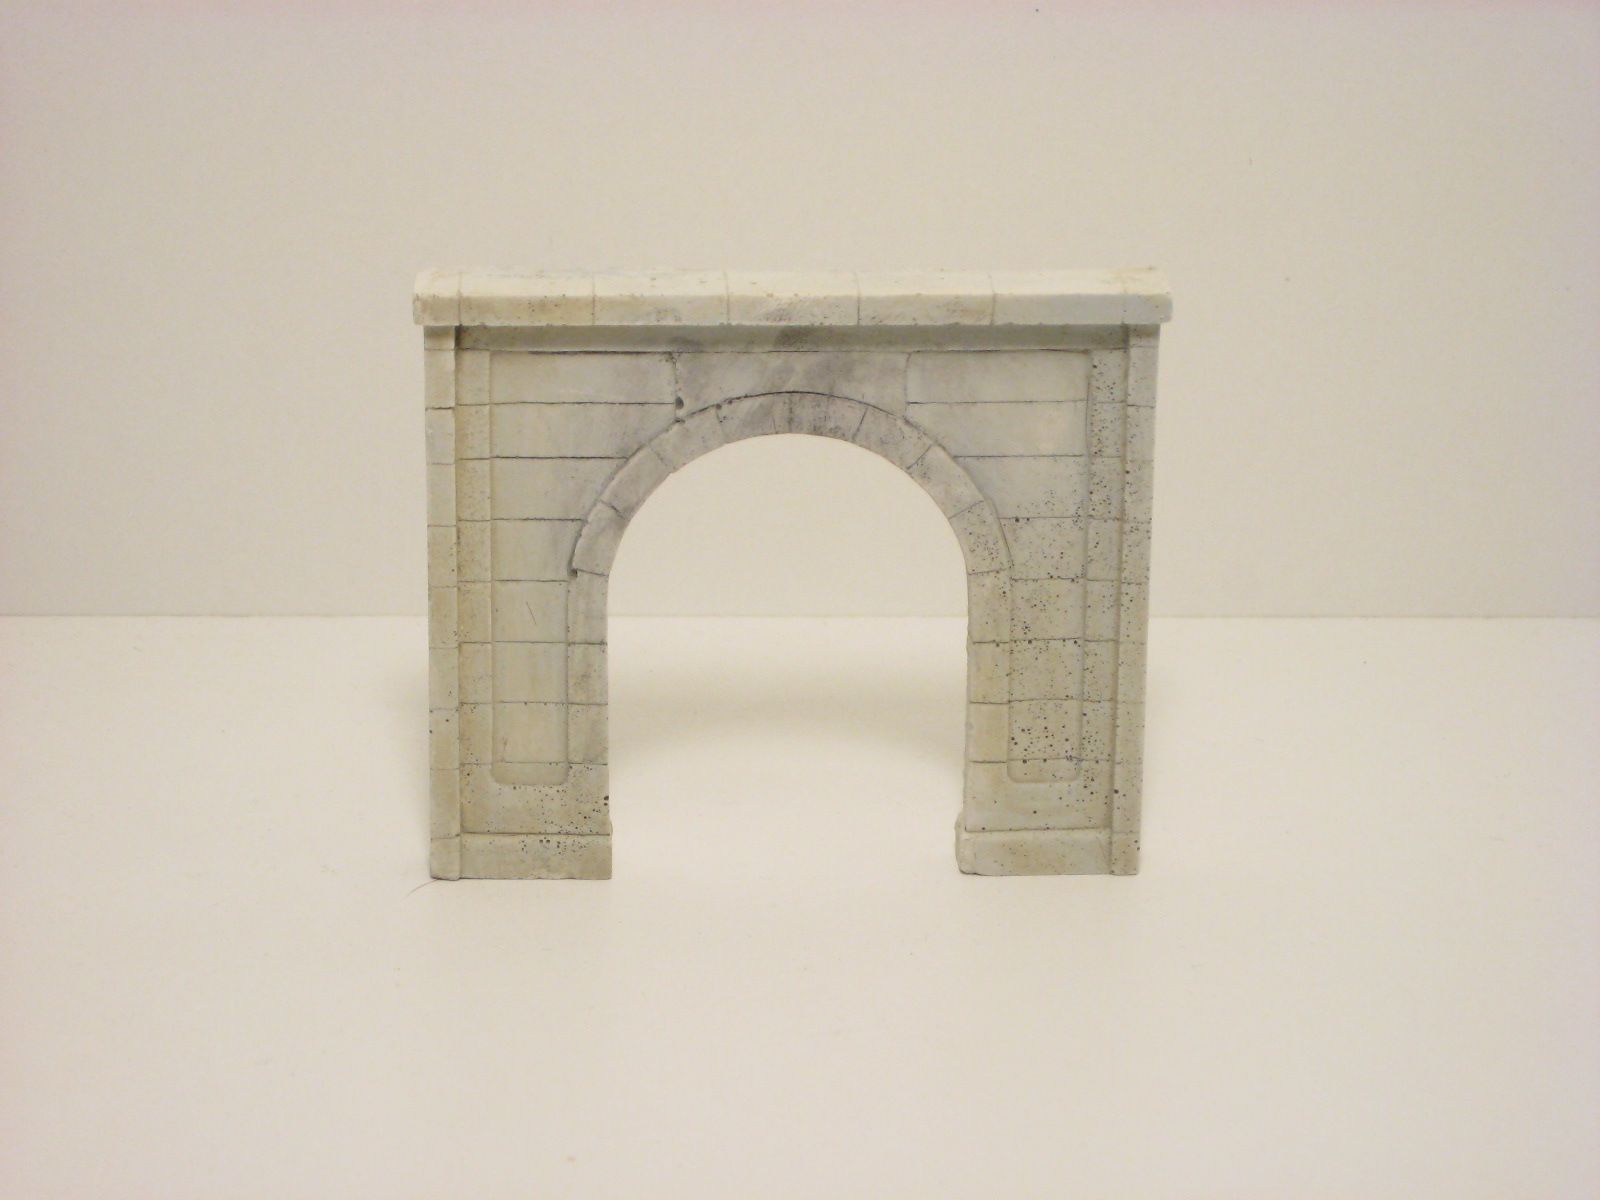
I will only need one tunnel portal on this ridge. The track along the back will disappear behind the ridge before it enters the tunnel. I used a tunnel portal available from Woodland Scenics. I painted it with a light gray wash, followed by a concrete colored wash. I added a black wash to towards the top of the portal to simulate engine exhaust.
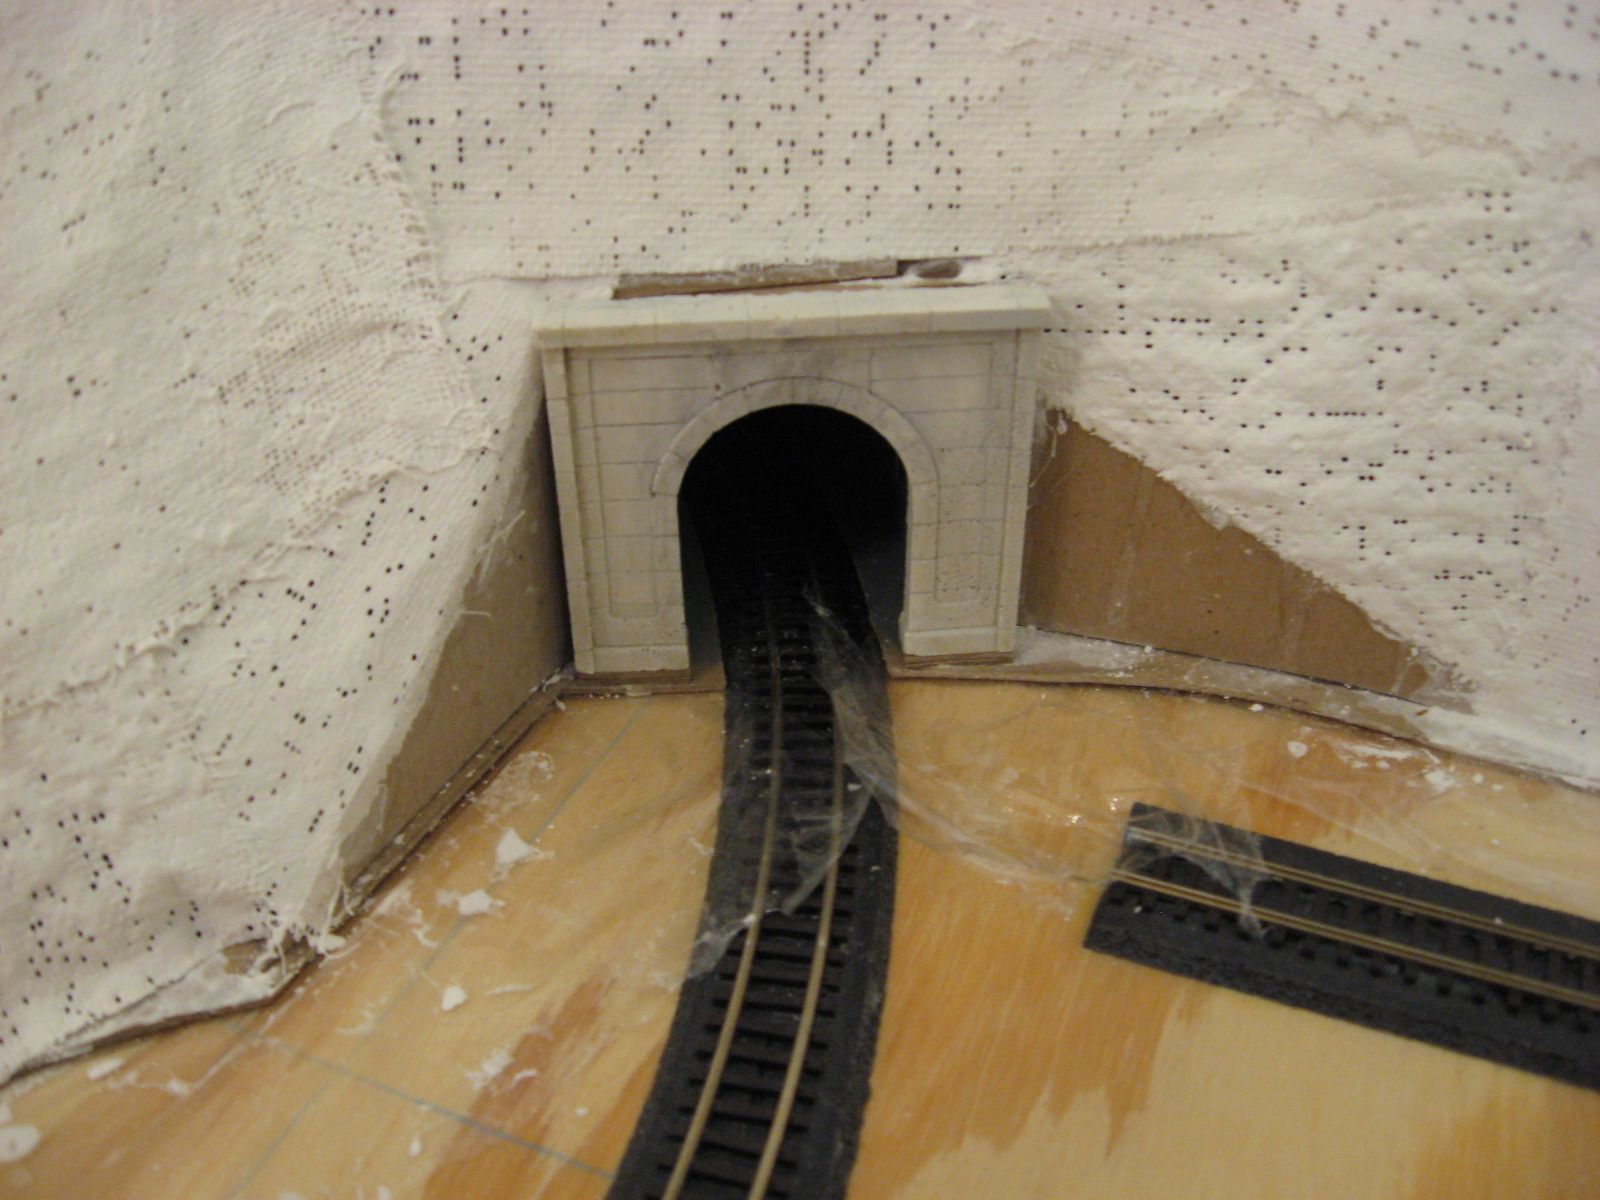
I had to carefully place the portal at the tunnel entrance. The curved track complicated the placement. Longer freight cars and engines would hang over the left side of the curve. Depending on the truck locations, the front and back of freight cars and engines would hang over the right side of the curve. The curved portal also factored in to the location. Long tall container cars would hit it. I had to raise the height of the portal a little. I glued the portal in place once I found its optimum location.
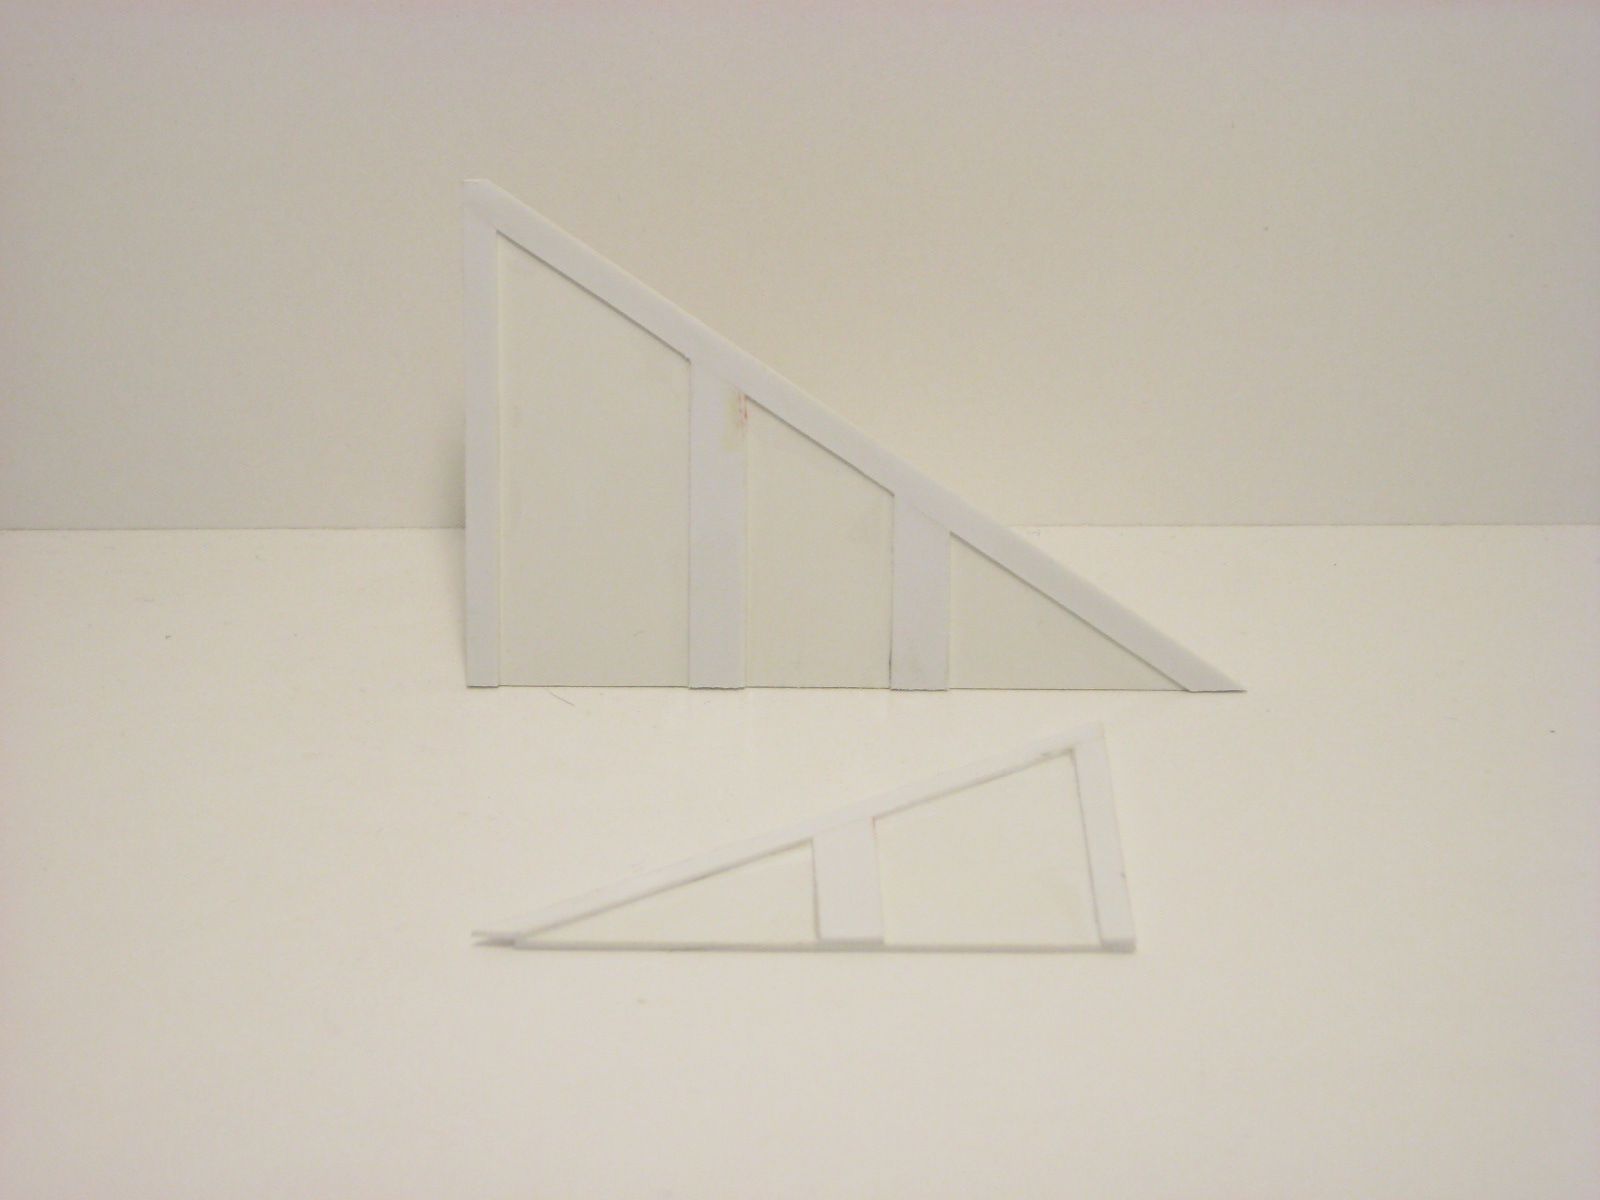
Next, I needed two retaining walls. I cut two triangular pieces out of scrap styrene to fit on either side of the portal. I added the raised framing to match the retaining wall near by underneath the overpass on the yard module.
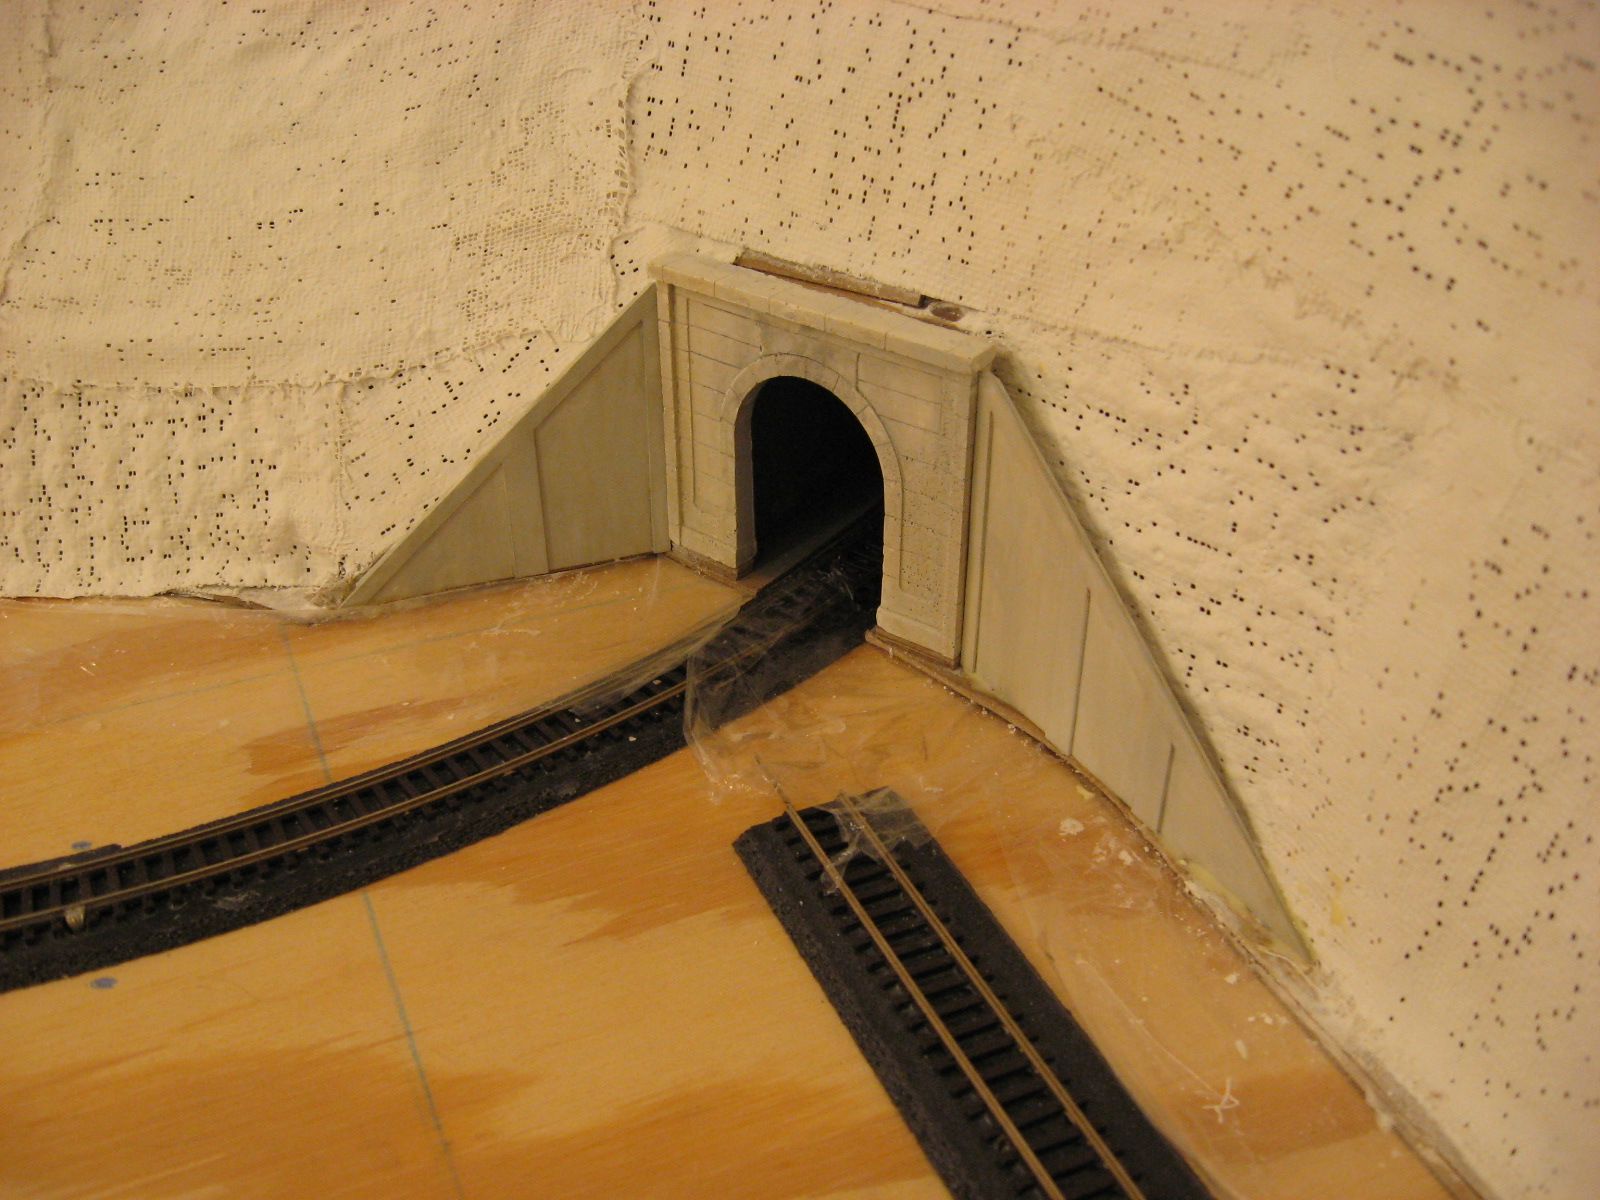
I painted the retaining walls the same way I painted the portal. I glued them in place on either side of the tunnel portal. I will later fill in the gaps behind the portal and retaining walls with sculptamold.